Focus techniques and getting sharp images in street photography rightly concerns many street photographers. This article discusses various manual focusing techniques including zone focusing/ hyperfocal distance, explaining how they work and when they are best for. Autofocus is also a powerful complement where manual abilities are limited. With the latest autofocus technology available today, photographers should take advantage of it.
If you find this helpful, SUBSCRIBE to my channel via the box on the left to make the most out of my blog! Also, do share it with people who might be interested. Shoot me an email/ DM to share your thoughts too.
Also, Pin this article to your Street Photography/ Photography Techniques boards in Pinterest if you find it helpful!
Auto or Manual focus for Street Photography?
Manual focus techniques in street photography can work very well under pleasant weather with sufficient light, especially with styles and situations that don’t require a shallow depth of field, such as multiple subjects in busy scenes. It also works best where the photographer is shooting on a prime lens. Autofocus is typically more beginner-friendly and would serve anyone new to the street photography game. Otherwise, it would come in handy when shooting on a zoom lens, or where a wider aperture has to be used due to a lack of light or requirement of background blur. Autofocus can be used together with manual controls to deliver excellent results.
Let’s take a deeper look into what manual focus and auto focus entails respectively in the context of street photography. For the ease of visual demonstration, follow the video tutorial on my Youtube Channel.
Manual Focus Technique I: Zone Focusing/ Hyperfocal Distance
Zone Focusing Camera Settings/ Specs
When adopting zone focusing in street photography, it is ideal to do it on a lens with focal length of 50mm or wider, and an aperture of f/11 or smaller. The longer the focal length of the lens, the more lens compression it is going to have, thus the more shallower the depth of field in general. As for apertures, the depth of field starts widening up significantly at around f/8 to f/11 for most lenses. Considering these two set of figures, zone focusing is the most effective when used on a wide lens with a small aperture because these are the conditions which gives rise to a relatively wide depth of field, sufficient to keep most subjects in focus under most circumstances.
How does Zone Focusing Work?
For the operation of zone focusing, do refer to the video linked above in which I did a live demonstration. Here is a written step-guide for your reference. You start from the focusing chart on the top of your lens.
Read the focus distance chart and pick an aperture that fits the lighting conditions of the scene. Set your camera to that aperture accordingly.
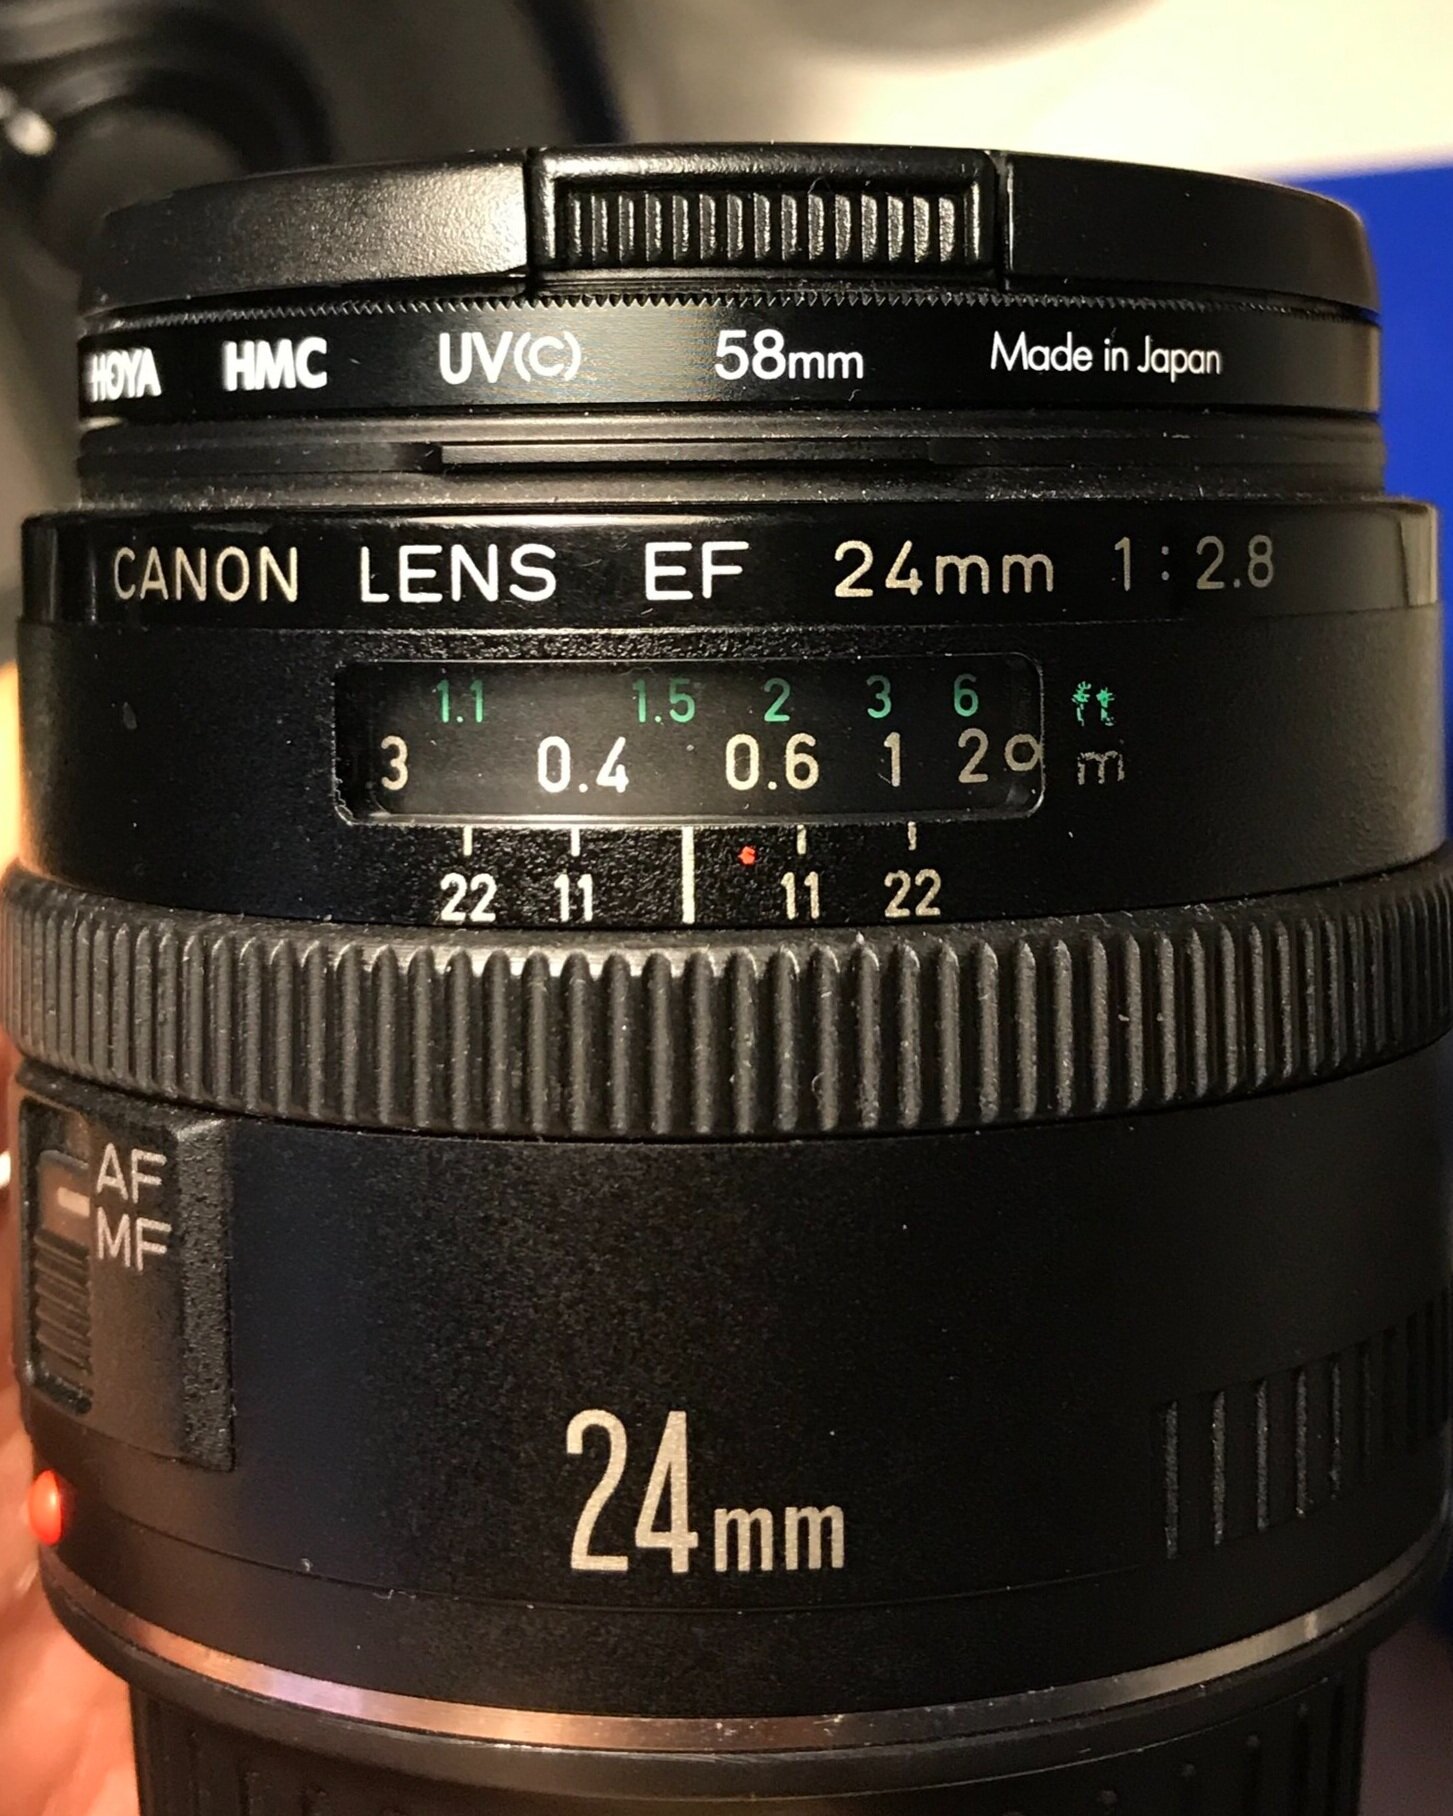
The focus distance chart is not the numbers that turn with the focusing ring. Some lenses only comes with the focus distance ring without these markings, so be sure to check if your lens has these markings. See the below image for reference.
It refers to the markings that are fixed on the lens, corresponding to f-stop values, typically 4, 8, 11, 16 and 22. They come in pairs, arranged in a symmetrical manner around the central axis, one each on the left and right for each f-stop value.
These are usually found below the focus ring, and above the aperture ring if your lens has one. They do not turn with the focus ring - they are printed directly onto the lens and their positions are fixed.
Note the starting and ending points of the zone on the focus distance chart, marked by the aperture value of choice.
The pair of values on the focus distance chart serves to indicate the close and far end of the focus zone, one on the left and another on the right
The positions of the two marks would correspond to the numbers on the focus ring, usually expressed in both feet and meters.
Turn the focusing ring bearing in mind the zone of focus, to the designated range for the scenario.
Some focusing rings turn anti-clockwise, but most turn clockwise.
Depending on the type of street photography you do and the place you are shooting in, adjust the required focus zone accordingly.
To focus as hyperfocal distance, turn the focusing wheel so that the infinity sign matches up with one of the ends of your zone, aka where the aperture values are marked.
Here is a labelled example using my Canon EF 24mm f/2.8 IS USM. Check out its latest prices on Amazon.
When to use Zone Focusing/ Hyperfocal Distance in Street Photography?
Bright Day
Based on the camera settings listed above, because of the limitation of a relatively small aperture of f/8 or less, without introducing motion blur by maintaining a shutter speed of at least 1/250, and without pushing creating an unpleasant level of noise by cranking up the ISO, zone focusing can be applied mostly only to situations with strong lighting. For instance when handling harsh lighting during noon time, brightly reflective building materials, or backlit situations.
No Need for Background Blur
Another limitation in relation to the narrow aperture results in a lack of background blur. Zone focusing therefore works well with street photography styles that feature wider scenes with various sub-scenes happening therein. These type of images typically feature multiple subjects, potentially at different distances from the camera. Benefitting from the wider depth of field, each of these subjects can be made in focus without the need to worry that the camera might get it wrong, and specifically with hyperfocus, the background can be in sharp focus as well together with the subjects. This is particularly a great technique to use for a frame that has a substantial context that deserves to be in sharp focus along with the human subjects.
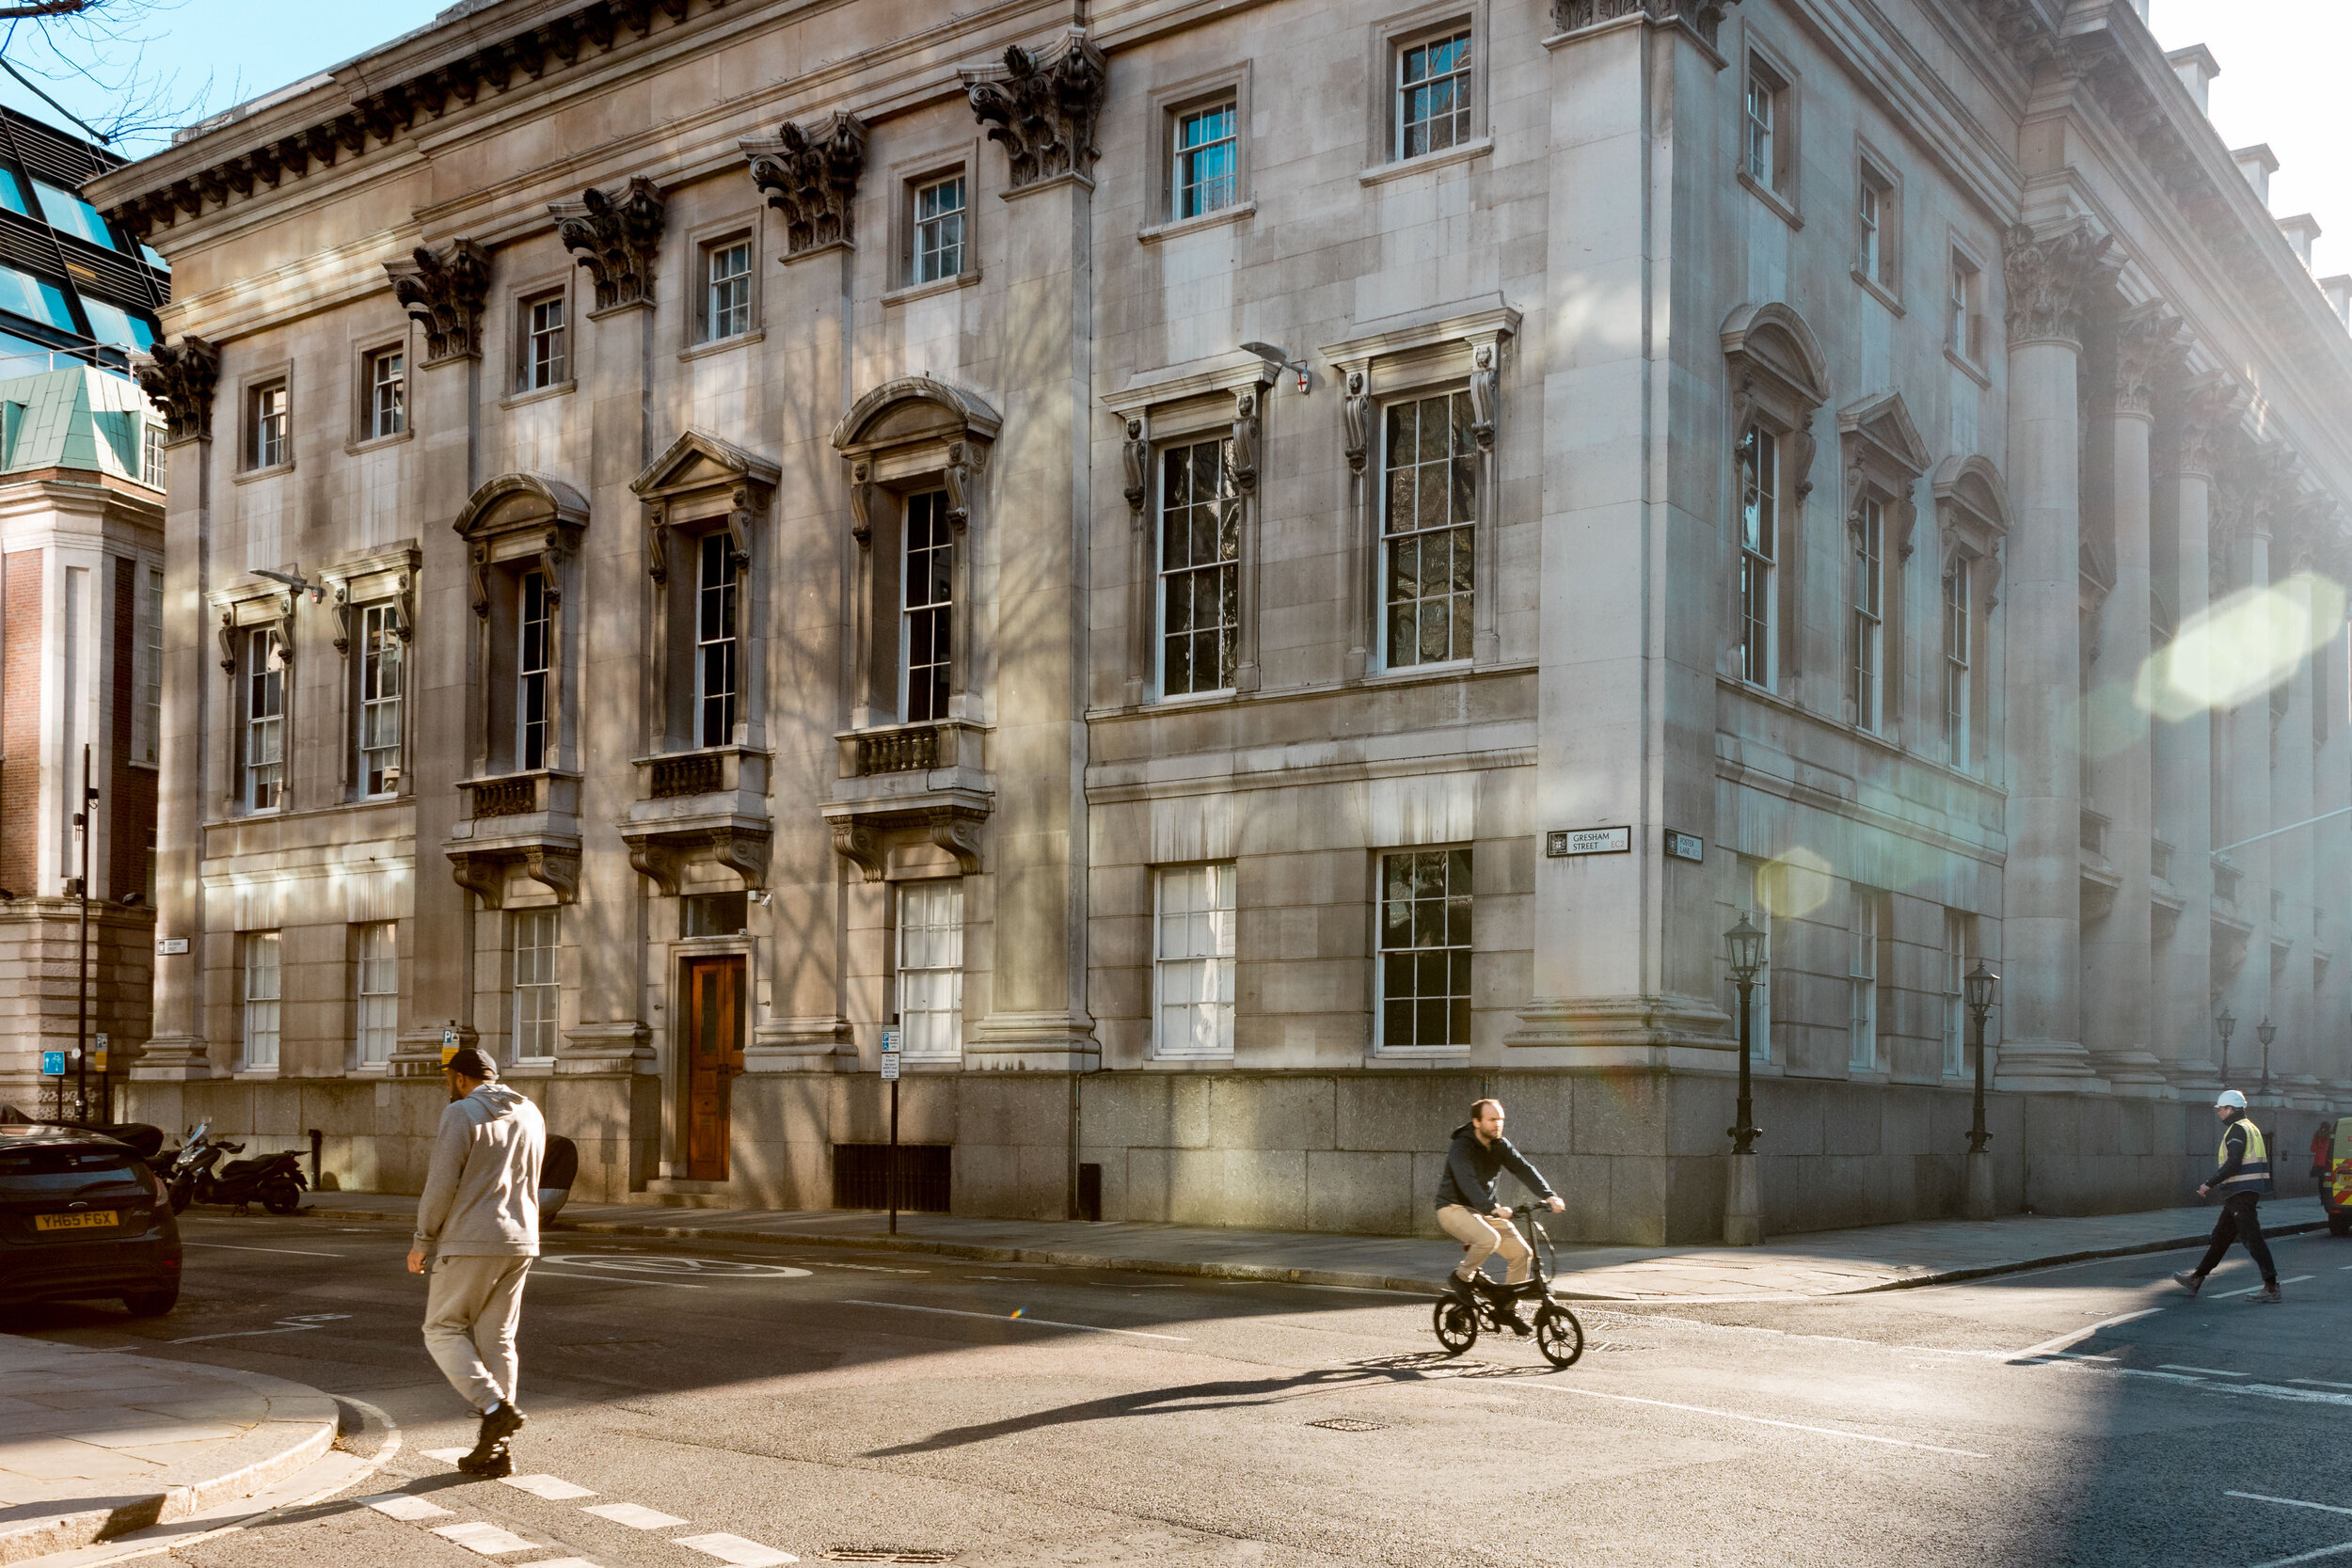
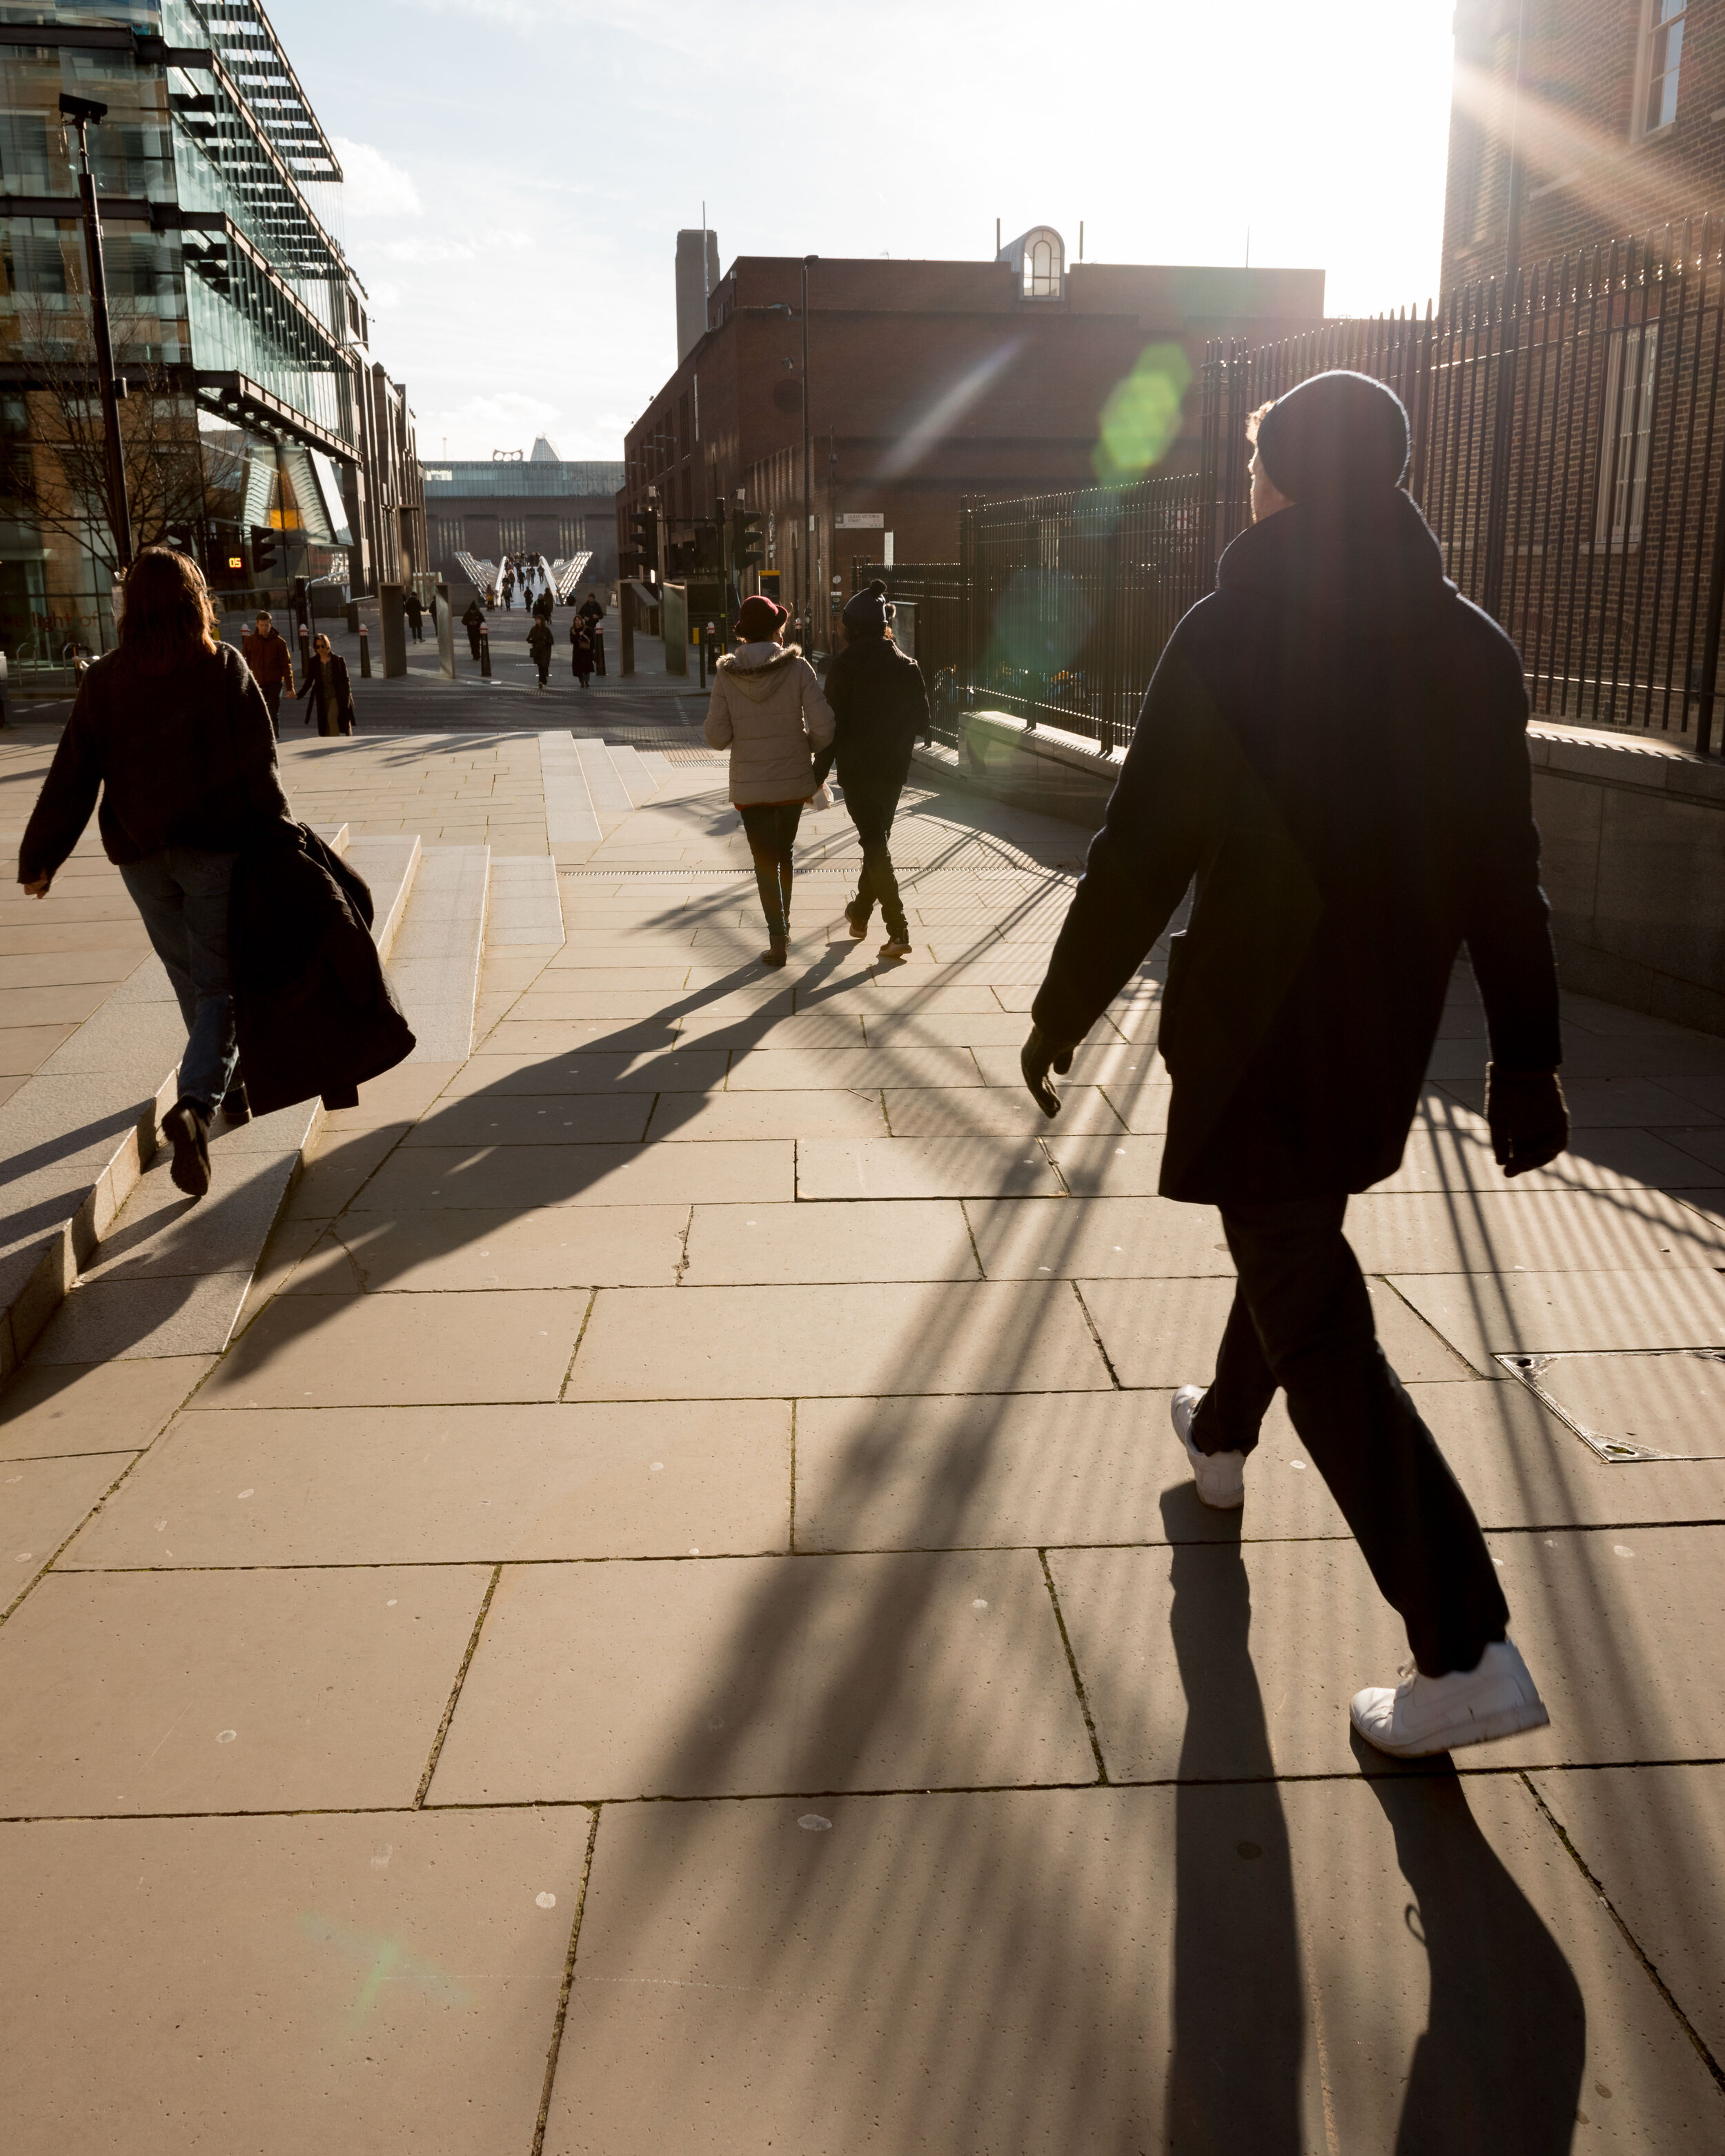
The following gallery contains examples of images shot using hyperfocal distance. This should give you a rough idea of the type of situations that zone focusing works the best in.
Specifically, these images were made on the Canon 24mm prime lens, with the aperture was set to f/11, shutter speed 1/250 and focus distance set between (approximately) 3 feet (or 0.8m) to infinity. So this was what my lens looked like. The distance that corresponds to the positions of the two f/11 marks represent the exact focusing range.
If you wonder how far away the subjects actually were from me when these shots were taken, refer to this PoV video below which would show you the entire process of making these images. You will need to develop your own sense of space but I can speak from experience that 3 feet to infinity is pretty darn wide. It covers 99% of subjects you would realistically shoot on streets.
When Shooting on Vintage Lenses
An added scenario in which zone focusing is very much the best technique to employ is when shooting with old vintage lenses, most of which do not have autofocus abilities, and those which have are incredibly slow. This can happen to photographers shooting streets on film, because in the era of film photography, cameras were pretty much a manual machine. Even for those with autofocus abilities, the technology was still in its very early days, which are probably not going to be very reliable for a street scenario. It also applies where photographers pair a vintage lens with a modern camera body to achieve a particular aesthetic. To mitigate the inherent lack of speed of older lenses, zone focusing is the way to go.
When Shooting on Prime Lenses
As demonstrated in the video, the zone focusing technique is designed to be used when shooting at a fixed focal length. It works very well obviously on primes, and you can use a zoom lens like a prime by simply not zooming. But based on what I have seen, most modern zoom lenses do not come with the focus distance markings, for the simple reason that they are not designated for such use, which makes it rather impossible to zoom focus on newer zoom lenses. As for older zooms which still came with a focus distance chart, I would resort to those only when I actually want to zoom because at a given focal length, zoom lenses tend to render softer images than primes, this was mostly the case with older lenses. In other words, using a zoom like a prime leads to unnecessary lost in sharpness. Knowing that I am to employ the zone focusing technique, I will opt for a prime.
So the point here is that although technically you can perform zone focusing on zooms, for various reasons it is made less practical, as it currently stands.
Bonus: Hyperfocal Distance vs Zone focusing?
As we have learnt from the video, the two are basically the same thing because they share the same rationale. Hyperfocal distance is basically one case of zone focusing, in which you set the far end of the focus range to infinity, and the closer end being whatever reading you get from the lens.
Technically, focusing at the hyperfocal distance is more likely to give less sharp results than using zone focusing. A lens is only perfectly sharp at one certain plane, and the sharpness decreases as distance from that plane increases. It follows that sharpness is a spectrum of values, not an absolute value. By focusing at hyperfocal distance, you are potentially trying to capture subjects spread across a wide range of distances, resulting in relatively soft, although nevertheless acceptably sharp images as compared to zone focusing, in which you have set a focal point that is much closer to where your subjects need to be.
That said, depending on the focal length of the lens and aperture you are shooting on, the depth of field that you get by zone focusing might not be enough for your purpose. In that case, you will need to resort to hyperfocal distance, taking the compromise of a slightly softer image, but more depth to work with.
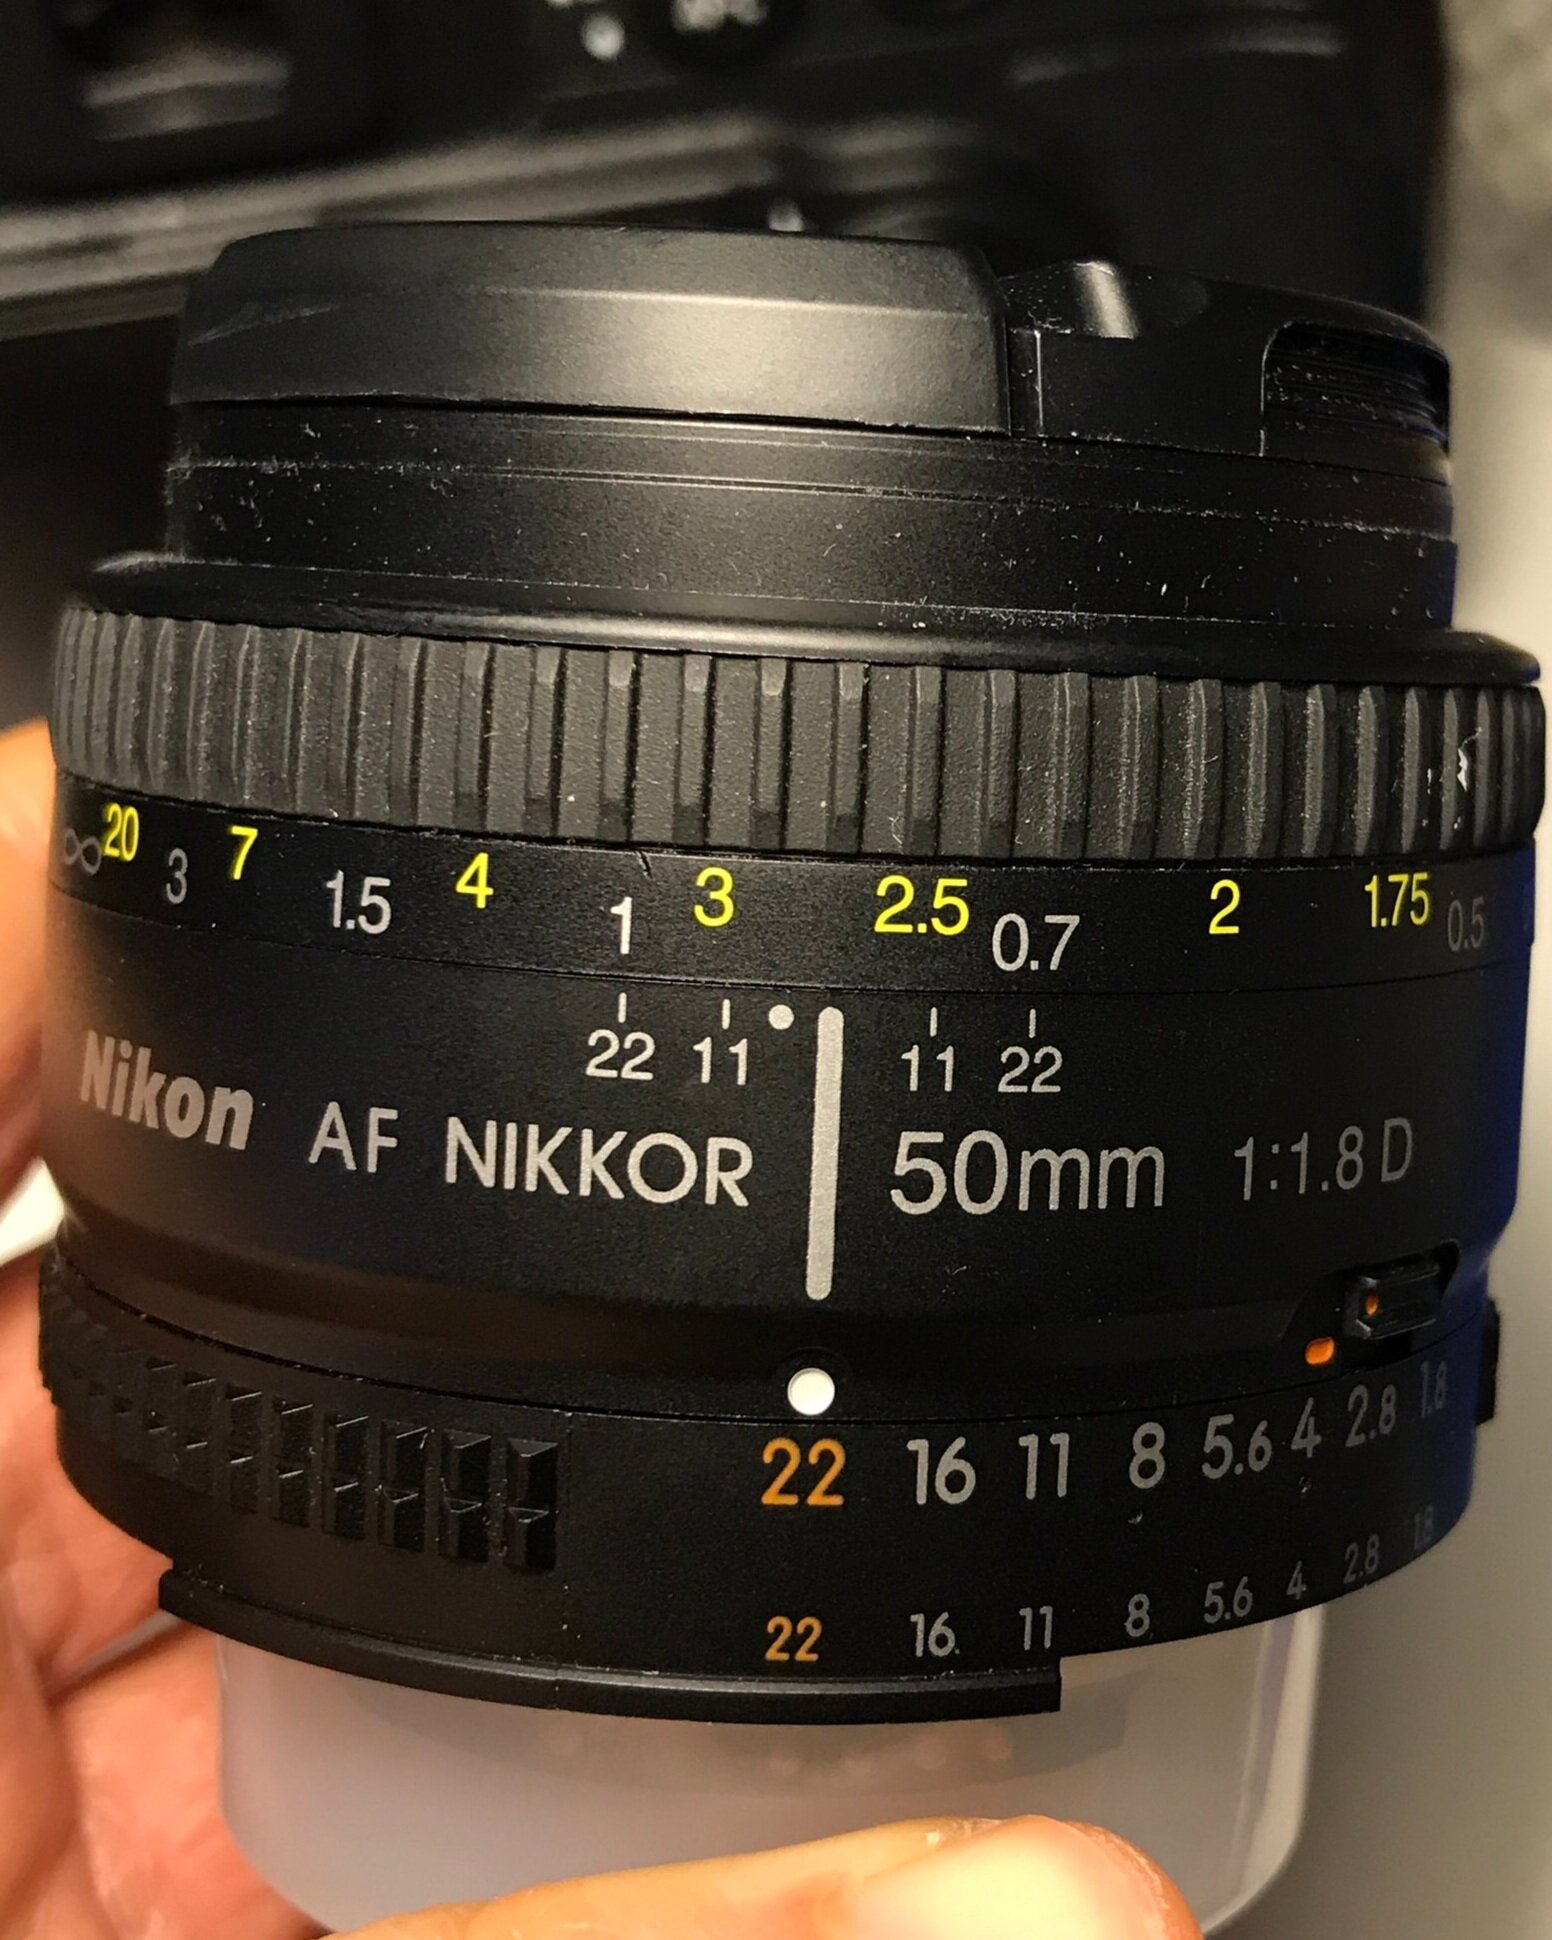
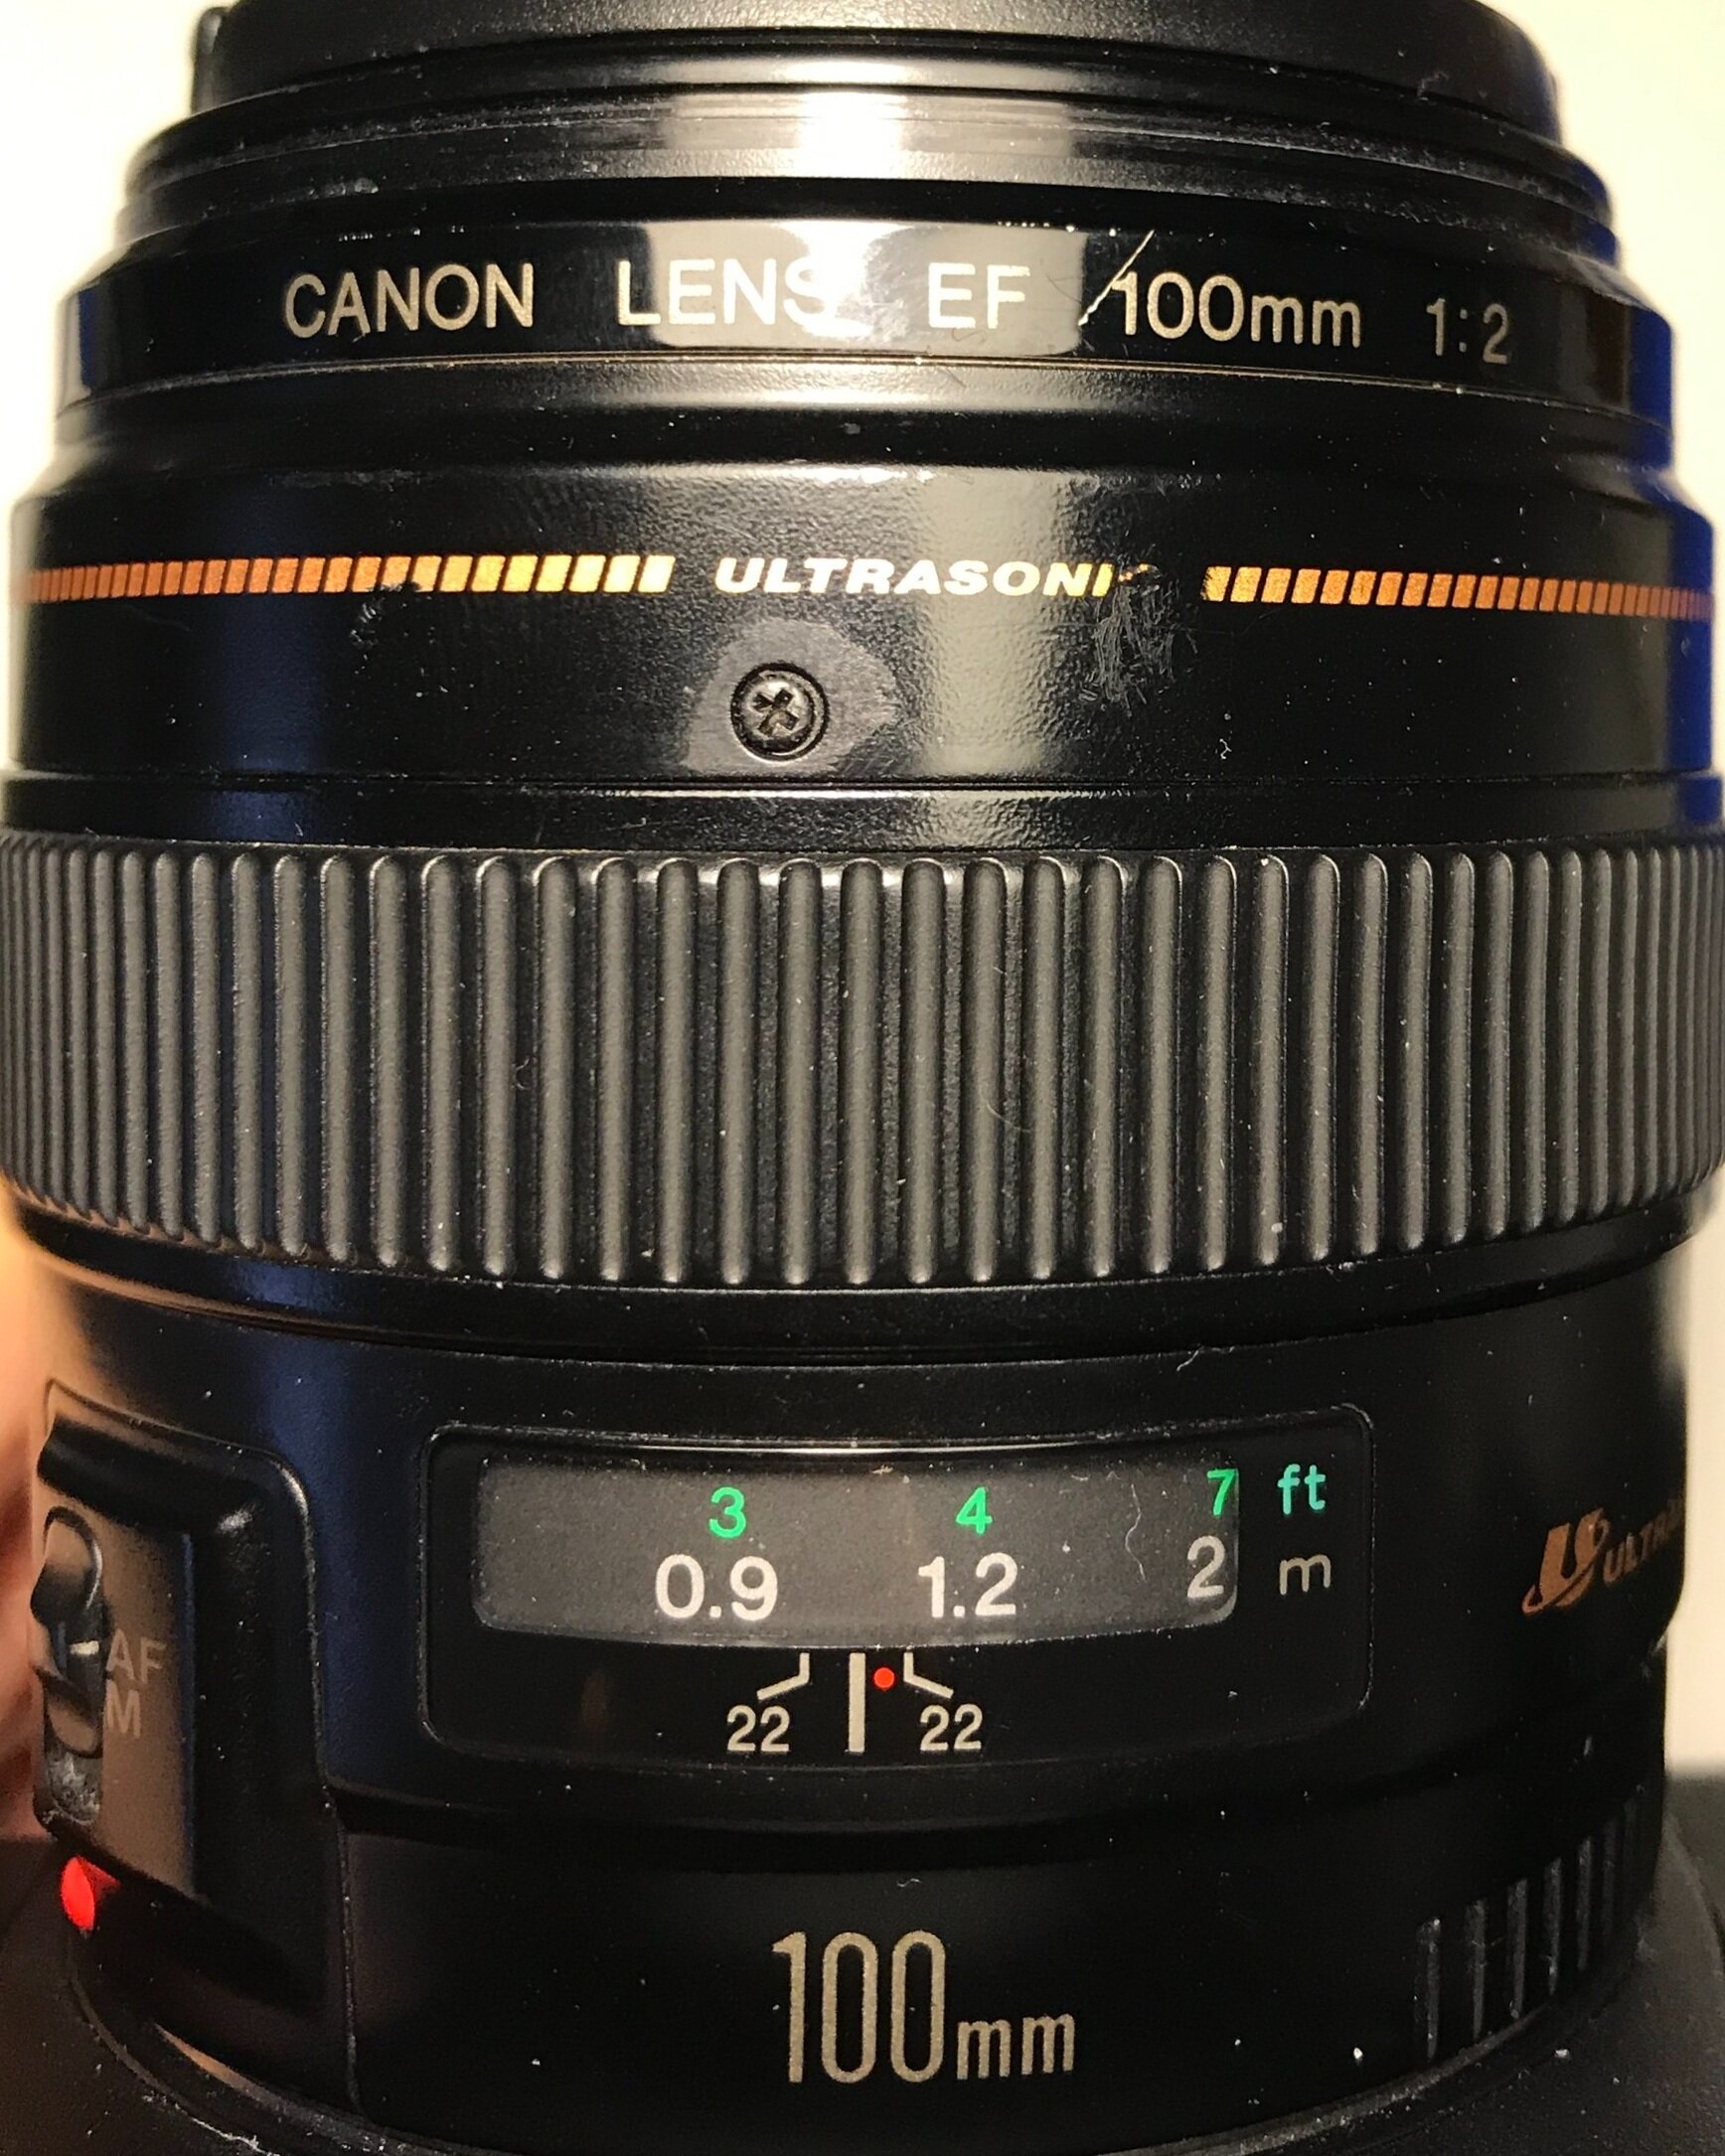
Here is a comparison of how the depth of field varies at various focal lengths. Assuming that all lenses are at f/22, firstly on the left we have the case of a 24mm, the centre a 50mm, and on the right a 100mm prime lens.
At f/22, the 24mm can focus between 0.35m to 1m. The 50mm can focus between 0.7m to 1m. As for the 100mm, I couldn’t even tell the range from the readings because the depth of field is too narrow for the markers to indicate anything. It follows that a wider apertures, the need for hyperfocal distances may be relatively less than compared with a longer focal length, because the depth of field starts narrowing with the increase in focal length.
Though this is my personal take - I usually just focus at hyperfocal distance when shooting street photography because the softness is manageable to me, and is a very fair tradeoff for the depth of field I get. I shoot in this contextual style that incorporates a wide range of thing in frame. That is just for the purposes of my style and my personal liking.
Manual Focus Technique II: Focus Peaking
What is Focus Peaking?
Focus peaking is a function on modern digital cameras, typically mirrorless cameras, which display ares in focus with markings on the LCD screen. It is a manual focusing feature that assist photographers to see clearly the parts in focus even under dim light conditions with low contrast. Some camera models also provide the choice for photographers to choose the desired colour of the markings.
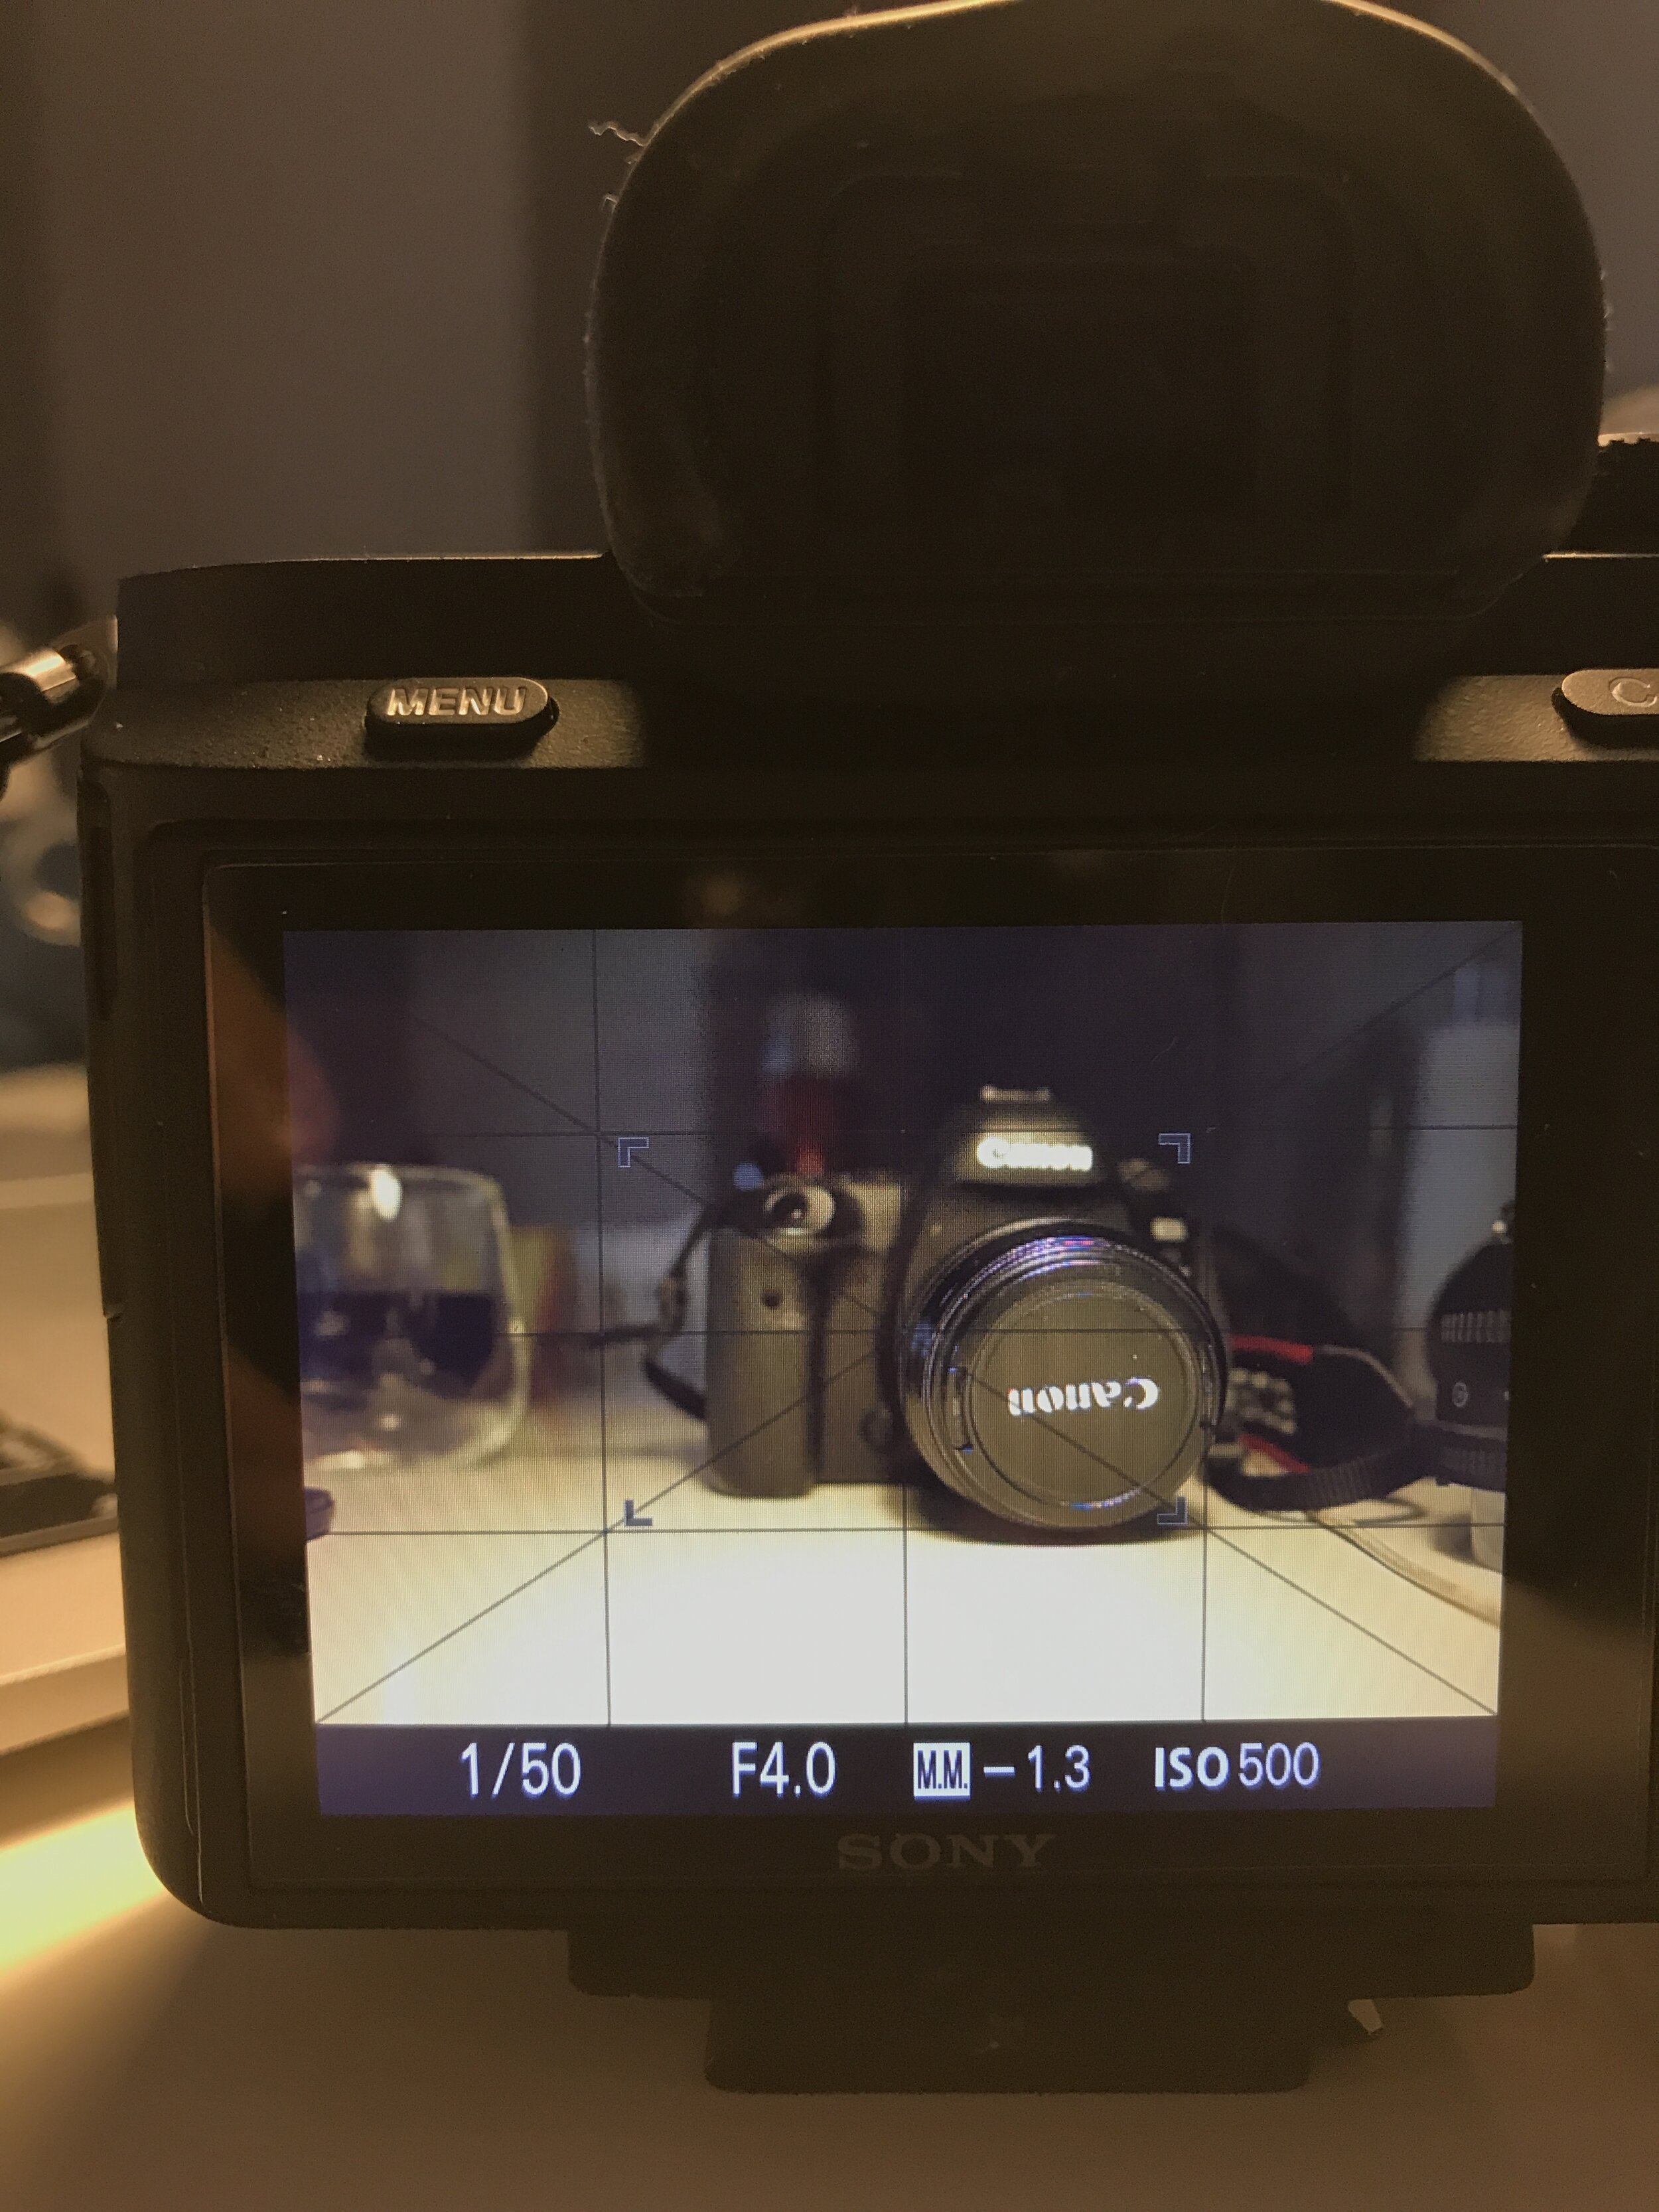
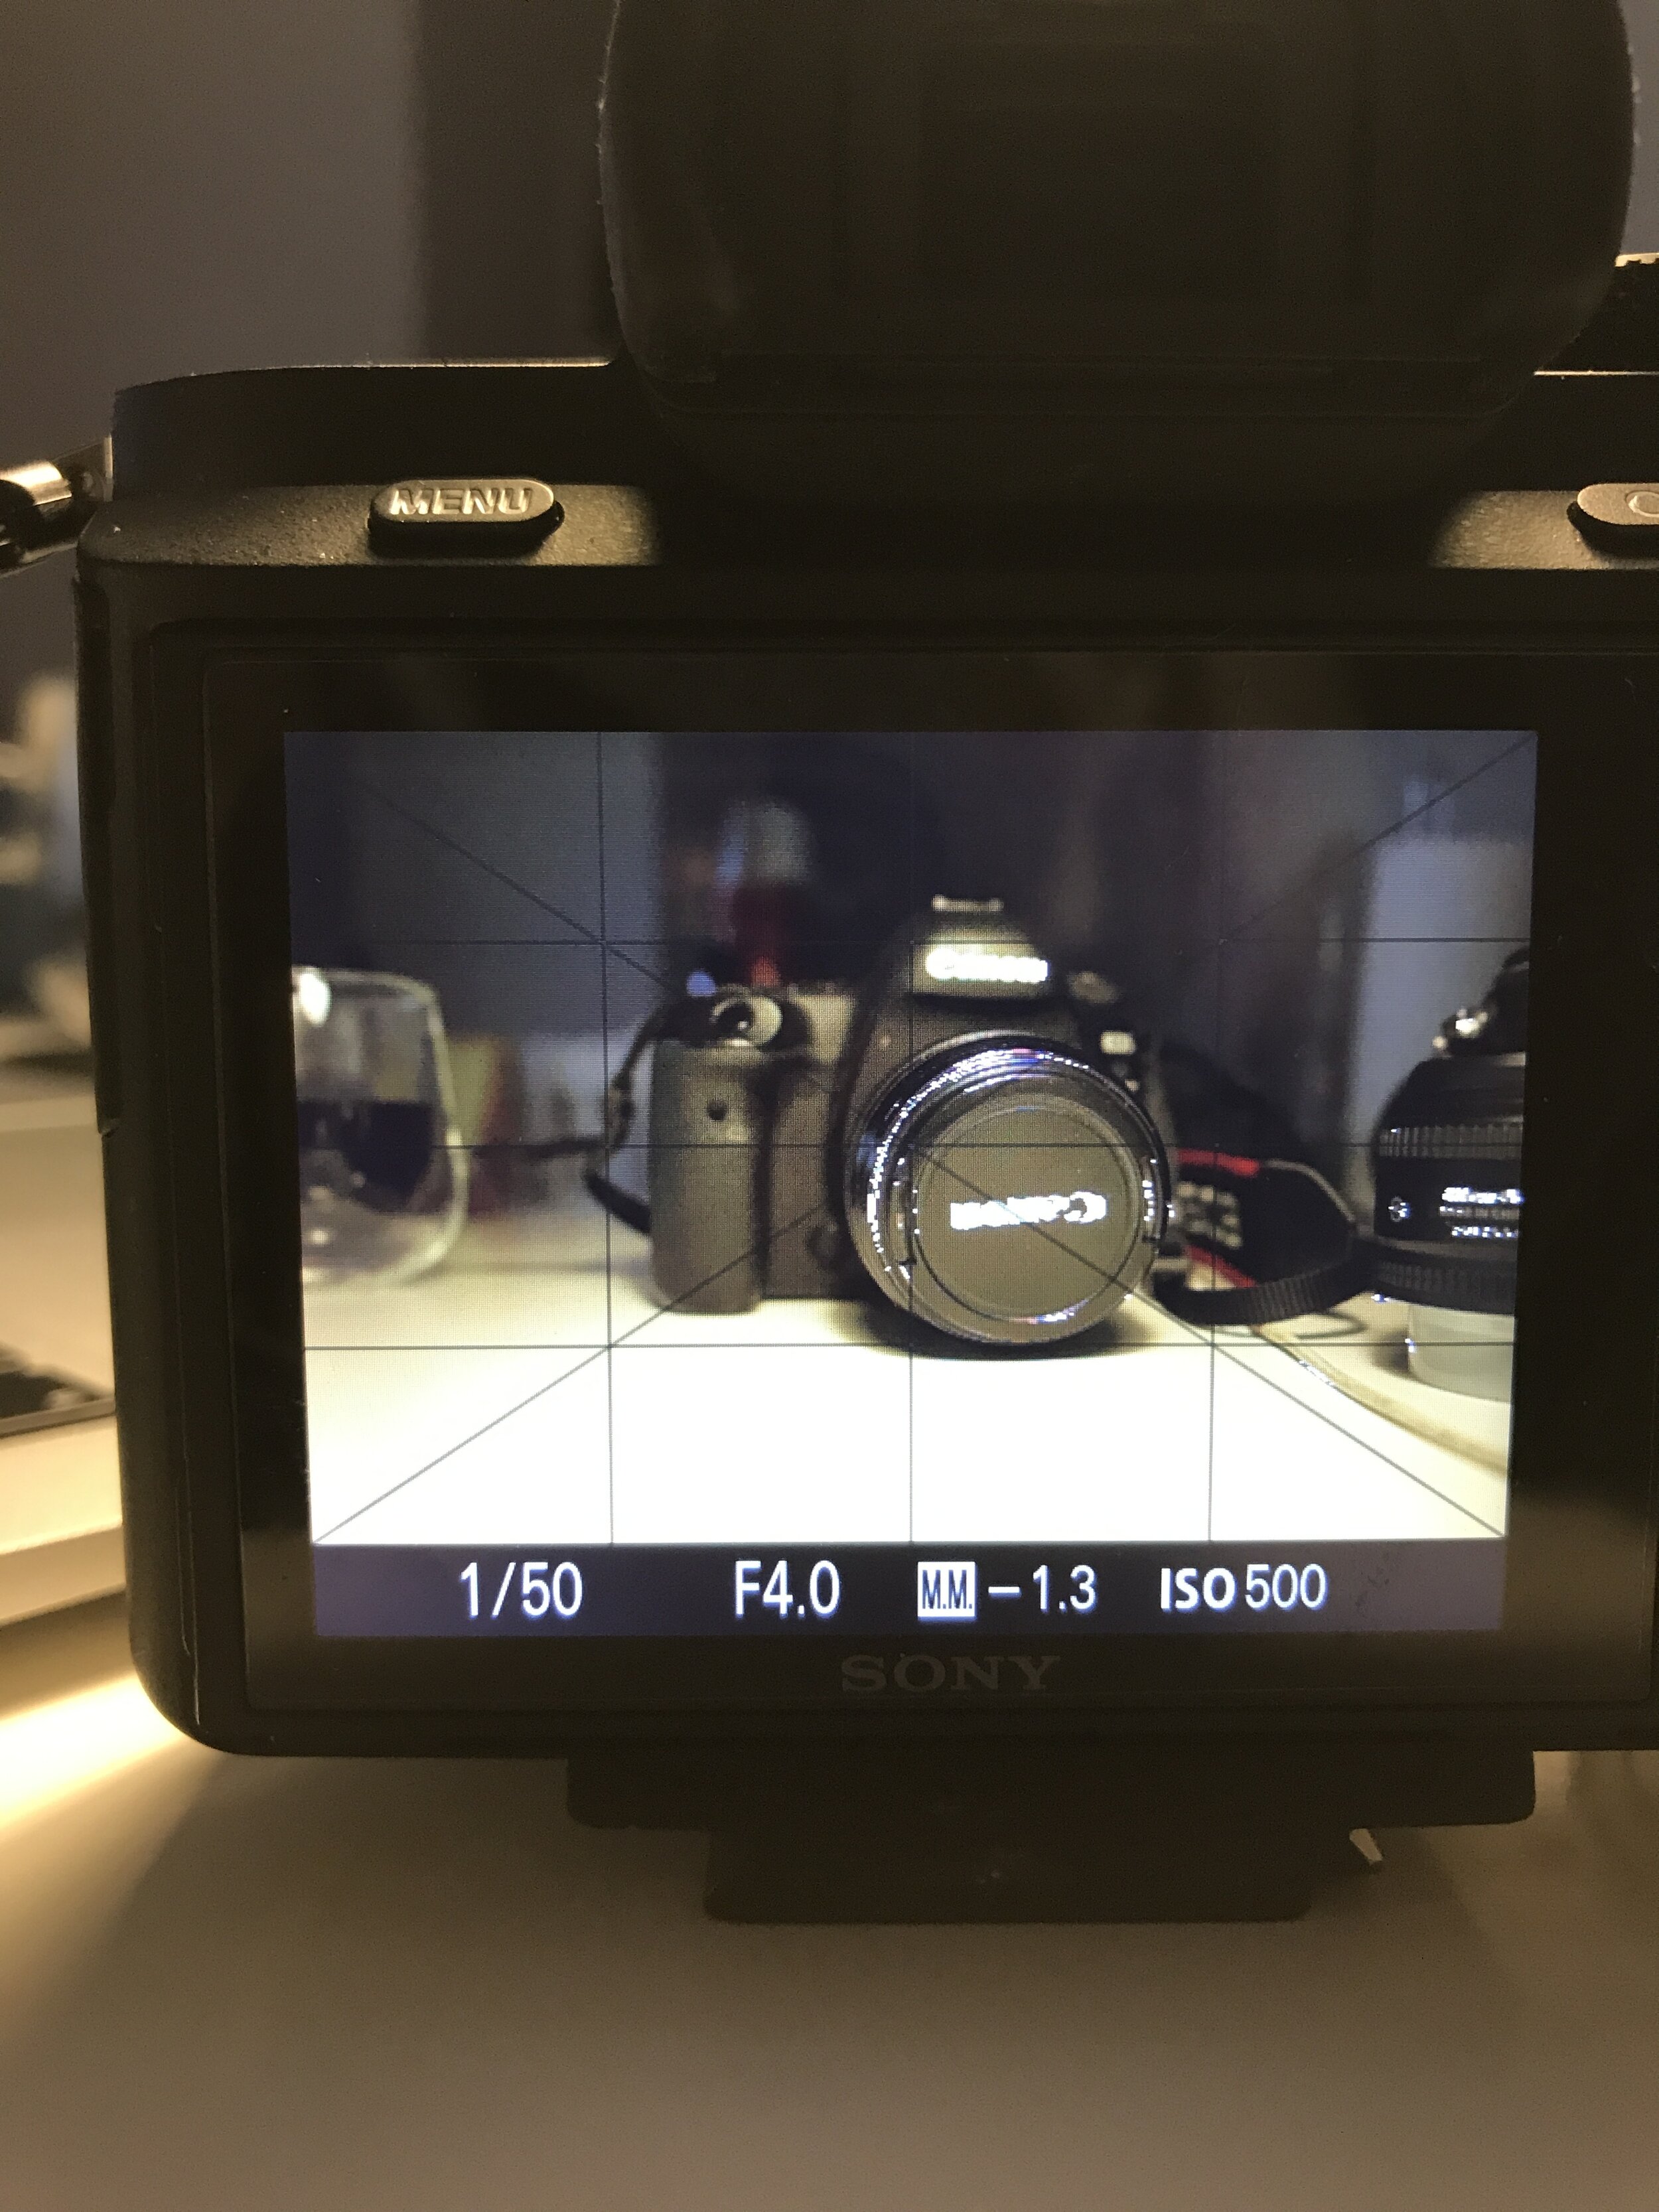
See the below comparison on the Sony a7ii (follow link to Amazon for latest price). showing how the LCD screen looks with and without focus peaking turned on. The settings and focus point are completely identical in the two shots, with the left image showing where focus peaking is not used, the one on the right showing the focus peaking markings displaying on the LCD screen. The focus is placed on the lens cap, which is marked in white dots on the image on the right.
How does Focus Peaking Work?
Firstly, check that camera model that you own indeed offers the focus peaking feature. If it does, you will need to opt for it in the relevant camera menu section, and then set the focus mode to manual focus. The focus mode must be set to manual focus for focus peaking to be turned on, as it is meant to be a manual focus assist function.
When to use Focus Peaking in Street Photography?
Focus peaking is a feature that will be there as long as you turn it on, and are shooting on manual focus mode. There isn’t a lot fo limitations in relation to focus peaking, and there is no downside to turning it on. However specifically in relation to street photography, it is mostly useful as a secondary technique that complements other focusing techniques like zone focusing. Focus peaking only shows with greater clarity the area that is in focus, but it is still down to the photographer to turn the focus ring based on the information provided on the screen. Therefore, it helps, but it is not a complete solution to the speed and accuracy required of the focusing in a street setting.
Though overall, it definitely is a good to have, especially where zone focusing/ hyperfocal distance are not possible.
Camera Auto Focus Mode for Street Photography
On the balance, single autofocus modes are the most practical. It is AF Single-Servo (AF-S) for Sony, One-Shot for Canon and AF-S for Nikon. In theory, continuous autofocus is more preferable for cameras with a high accuracy in following subjects. However in practice, the autofocus in most cameras do struggle to trace moving subjects correctly, and that the heavy consumption of power does create delays. With single autofocus, photographers can know with certainty where the focus is before taking the shot, without running the risk of having the focus switched to a wrong place last-minute.
Single vs Continuous Autofocus for Street Photography
This varies quite a bit for every street photographer, depending on how capable the autofocus is on your camera. In the ideal world, where the camera can correctly predict and trace the movement of subjects without delays, using continuous autofocus is a no-brainer. But based on my experience, due to the heavy computing power required, the focus tends to lag and jump around quite a bit despite getting it right initially. Therefore personally, I stick to single autofocus, which allows me to lock the focus at where I need it to be, which is good enough for most human movements on streets. There certainly are shortcomings of using single autofocus rather than continuous autofocus, but personally I am able to mitigate these to achieve decent focus in my photos.
The strongest case for a street photographer opting for continuous autofocus is its ability to trace moving subjects. Firstly, as explained above, this ability is often overrated in reality. Secondly, I find that I get better results by taking multiple shots quickly using single autofocus than to take one shot using continuous autofocus. With each exposure just a fraction of a second apart, this essentially achieves the same thing as continuous autofocus, considering the speed of most objects in a street photography scenario. Moreover, f5.6 is usually the widest my aperture gets. Seldom do I find it appropriate to open up the aperture further because context is important in my street photography. With my lens at f5.6, the depth of field is generous enough to cater to the distance travelled by the subject in between my shots. Plus, moving subjects accounts for probably only half of my shots. Therefore on a whole, single autofocus is my autofocus mode of choice.
Autofocus Area Selection
Manually selecting the autofocus area is a great way to enhance the accuracy of the autofocus of your camera, whatever focus mode you are using. As demonstrated in the video, most cameras offer a range of options in relation to selecting the focus area in the frame. On the specific end, some modes allow the photographer to pinpoint a single focus point, whereas on the general end, there are modes that allow the photographer to select a range, and then leaving the autofocus to search for a subject within that range. Personally I am more inclined towards the latter, because in the case of shooting a moving subject, I can be sure about where they are heading towards roughly, but not exactly. I can at most predict the general part of the frame the subject would wander into, but not the exact position, and this is where the autofocus comes in helpful. There has to be a balance of narrowing the camera’s search while making the most out of its abilities.
Summary
In this article, we talked about:
Whether you should use auto or manual focusing for street photography;
How zone focusing/ hyperfocal distances work;
When to use zone focusing/ hyperfocal distance in street photography;
The difference between zone focusing and hyperfocal distance;
When to turn on focus peaking and how to do so;
Whether to use single or continuous autofocus for street photography, and why;
Selecting an autofocus area.
More sharing coming soon!
SUBSCRIBE via the box on the left for more PRO tips, and follow me on Instagram (@_bjiao__) and let me know what you think in the comments!
Share this article on Pinterest too!
Keep shooting, keep creating!
The mission of this blog is to provide the best insider information in the photography industry, as openly as possible. You have direct access to my
first-person experience as an aspiring photographer who talks, but also works.
Honest opinion are rarely available as public resources because this is a competitive industry. Huge sums are made when such information is delivered in the form of mentorship and workshops.
This blog is a great way in which I cover my daily expenses, but also provide real value.
If you have learnt something that would be worth at least $10, please consider donating to the page. This enables me to keep creating content and helping more people sustainably.
Your continued support for the blog is appreciated!


