Getting yourself a reflector is probably one of the most significant steps in a photographer’s career. It represents the ‘ah-hah’ moment when a novice photographer becomes aware of the magical powers of good lighting.
This though, is a rather awkward phase as on one hand, the photographer understands the directional nature of light, and would like to exert his creative control over the final image; on the other, he is on an extremely tight budget.
He has enough funds to get the most basic of all lighting gear, the reflector, but not enough to hire himself an assistant. Did he just waste his hard-earned savings on buying a reflector that he couldn’t actually use?
If you feel trapped as such, fear not, because this article is going to teach you how to be resourceful and make do with what you have.
Starting a photography business is an ultimate test of character. Find joy in the humble beginnings, and you will find yourself in abundance in no time.
This article is going to address
Do you actually need a reflector?,
How do you use the reflector without an assistant?, and
What are the pros and cons for each of these methods?
Here are two simple, cost-free ways to operate your reflector without an assistant. Firstly, press the shutter with one hand and hold the reflector in another. This requires you to be able to hold the camera steadily with one hand. Or, rest your reflector on objects found on set. This works best in locations with a considerable amount of sundries.
If you find this helpful, SUBSCRIBE to my channel via the box on the left to make the most out of my blog! Also, do share it with people who might be interested. Shoot me an email/ DM to share your thoughts too.
Also, Pin this article to your Camera and Gear/ Photography Techniques boards in Pinterest if you find it helpful!
To see how all of these tips play out in real life, see the video below for demonstration.
Do you Actually Need a Reflector?
Yes, unapologetically, yes.
This is the point at which the photographer suspects that he has grown out of what he is shooting with, yet is slightly put off by the very foreign concept of requiring assistance.
It certainly takes time to get accustomed to the idea that shooting is no longer as simple as an excursion you go on with your camera; it becomes an event that requires detailed planning, potentially involving an extra pair of hands.
The process feels uncomfortable but growth never happens without some struggle.
In case you are lost in the sea of reflectors available out there, this is the ONLY reflector I have owned in my entire photography career: Godox 43-Inch (110cm) 5 in 1 Round Portable Collapsible Multi Disc Light Reflector. I have been using it extensively for portrait and fashion work and it has brought me a long way. Check out its latest price on Amazon via the link.
Here are two solid reasons why you REALLY need a reflector. First, it improves the quality of your shots by retaining shadow detail. Secondly, it is the gateway through which you enter into the world of artificial lighting, which is a pivotal moment in your photography career.
Get over your doubts and simply admit the fact for what it is: a reflector makes your photos better and is an essential investment in the long run.
It is all in your head. You can totally use a reflector without an assistant; you just want an excuse for trying to get by without learning how to use it.
Once you set your heart on learning how to use it in your shoots, what looks like unsurmountable obstacles will fall away.
How to Use a Reflector without an Assistant?
Alright, so you made the conscious effort to start shooting with a reflector. Now what?
Here are two simple, highly doable methods for those of you on a tight budget.
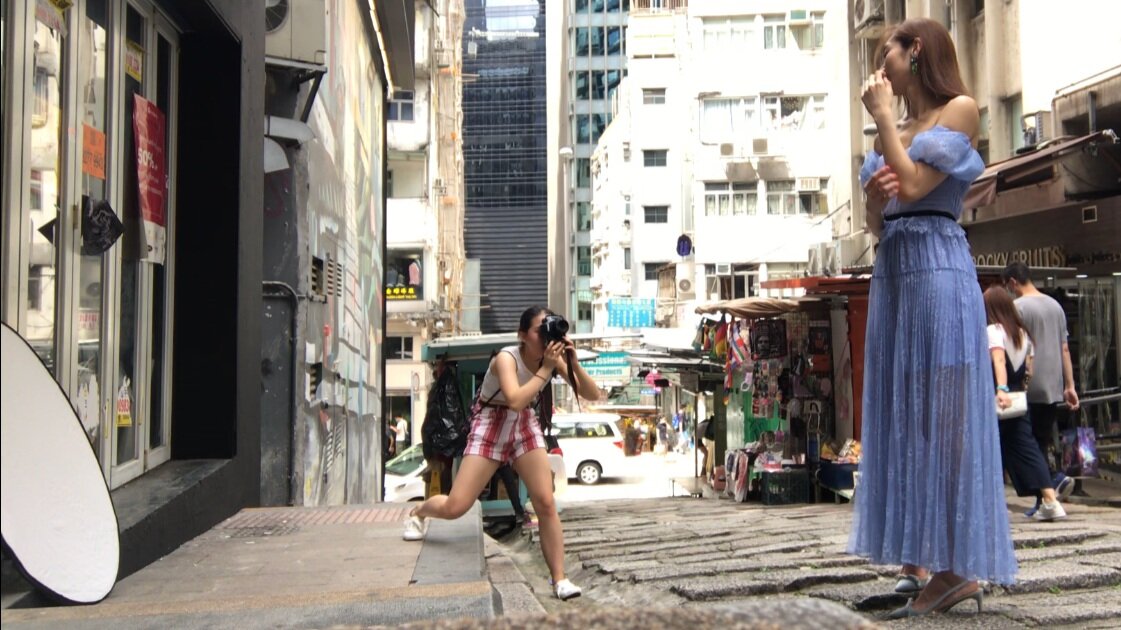
Method I - Hold the Reflector with One Hand, Shoot with the Other
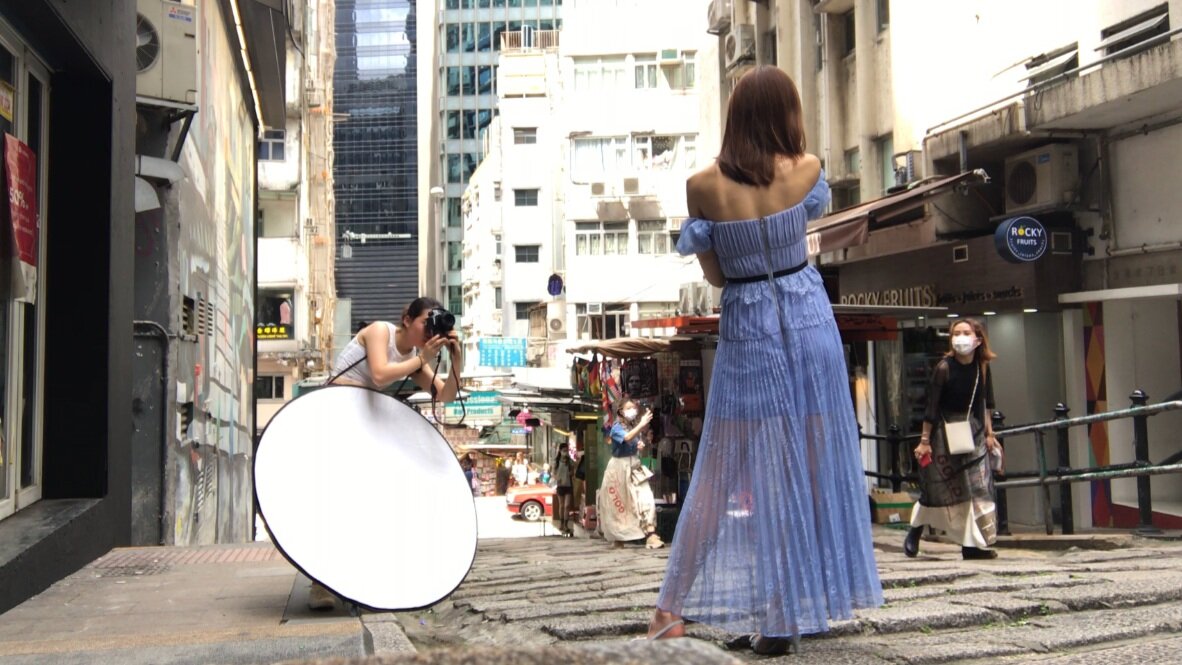
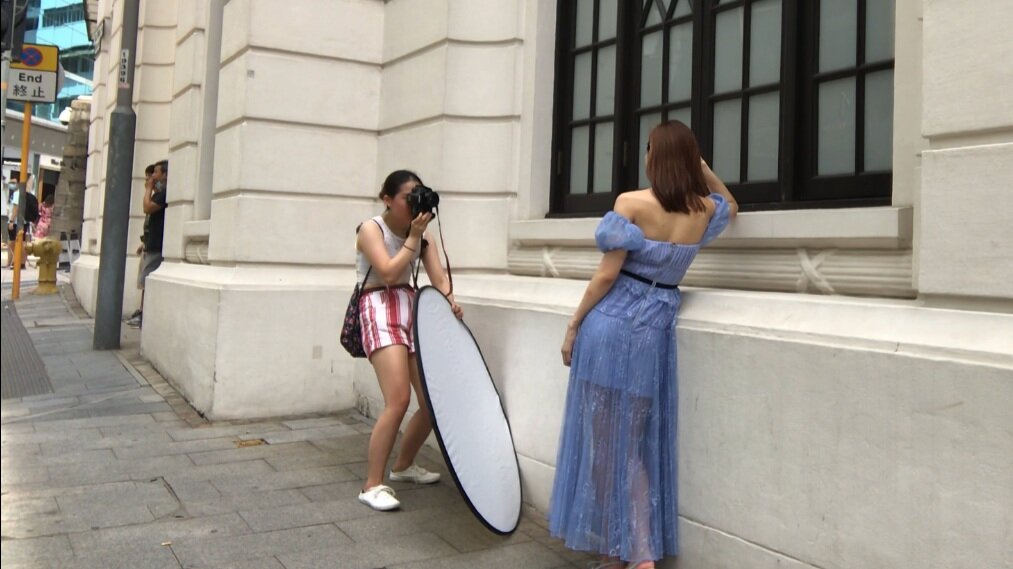
This is what it looks like:
When I first encountered this no-assistant dilemma, I grossly underestimated the power of a reflector.
This idea doesn’t feel right instinctively, because you would think that you would be too far from your subject for the reflector to make a difference, or that the reflector needs to be at a particular angle for it to work.
These may all be legit concerns, because having someone hold it for you is always better than holding it yourself.
But the reflector is more versatile than you think in that it doesn’t require a crazy level of precision to bring about a massive improvement in shadow fill.
Plus, some fill is always better than no fill.
Here are situations in which this method works perfectly.
When you are Using a Large Reflector (~120mm Diameter)
If you use a reflector of this size, it should reach your waist level at least. You could simply rest the upper end on your body or hold it with one hand, and rest the lower end on the floor.
Even for photographing standing people, a reflector of this size is large enough to reflect a reasonable amount of light back onto your subject, unless your angles are way off.
Depending on where the light is hitting, rotate the plane of reflection to roughly target the shadow areas.
I usually observe the scene via my viewfinder while adjusting the reflector to look for the optimal angle.
When you are Shooting with a Lightweight Lens (eg. wide to mid-range prime lenses)
As you hold the reflector with one hand, you will have to operate the shutter using the other hand. This can be challenging to those who are not used to heavy gear - half of the camera support is now taken away from you.
Steadiness is a trait that is worth training your hands for, especially when you run into situations where you need to do everything yourself (which is frankly, how photographers live).
An easy way to start is to practice when you are shooting on a relatively lightweight lens. Releasing one hand isn’t that much of a jump in these situations, and you can always notch up your shutter speed where necessary to reduce camera shake.
When you are Shooting with a Relatively Wide Lens (eg. 35mm, 50mm etc)
This has to do with how far you are from your subject.
Personally I own a 150cm reflector, which is capable of filling shadows in most situations from my position from the model, even when I am shooting with a 100mm.
Depending on the size of your reflector, this might be different.
A general rule is that the closer you and your reflector are from your subject, the more powerful the shadow fill.
It takes some experiment to learn the maximum focal length at which you can make a conspicuous difference to your subject while holding your reflector next to you.
Pros of Holding the Reflector Yourself
Here are a few advantages of using this method:
No extra costs incurred, as opposed to getting light stands and clamps, hiring assistants etc
Reposition your reflector freely in between shots as you proceed and discover better angles
Minimal spatial requirements to ensure flexibility in location choice - setting up light stands imposes way more restrictions on where you can shoot
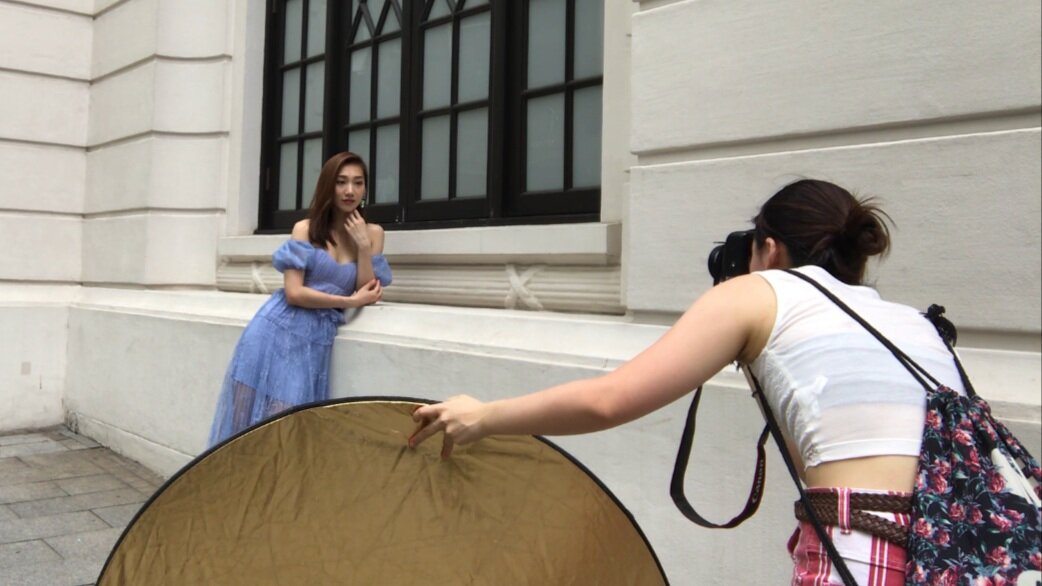
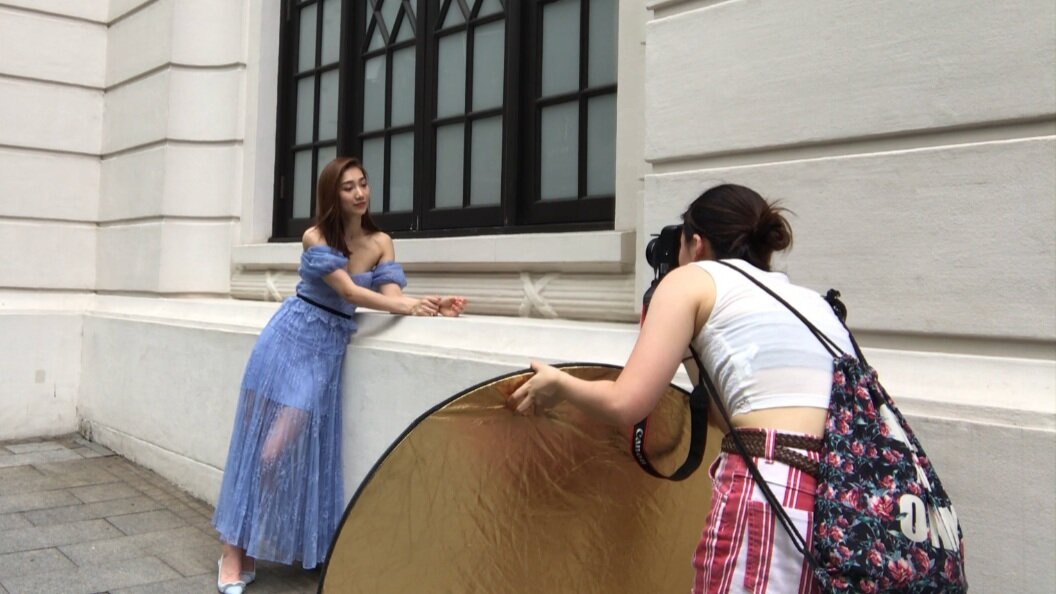
The following series of photos demonstrate how easily you could change the direction of your reflector:
Cons of Holding the Reflector Yourself
And with any perks come some corresponding downsides:
It is physically tiring and might lead you to feel exhausted earlier on in a shoot
There are limits as to the distance you shoot from and the angle you are able to hold your reflector at
Method II - Make use of Objects in the Surroundings
Being a photographer requires you to be resourceful in your problem-solving and just getting things done. Not having professional gear is no excuse.
Making do with what you find in your surroundings can get you better results than you imagined, and it is a valuable ability to have down the road.
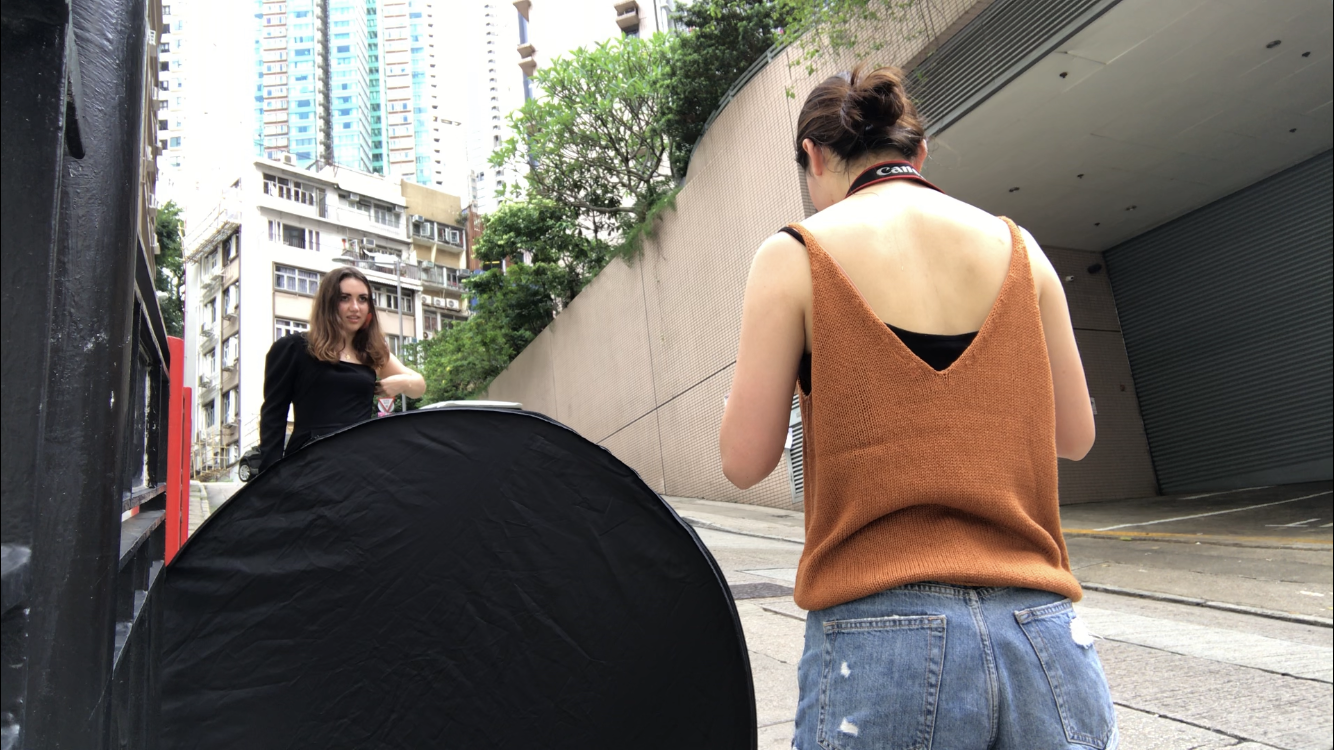
This is what it looks like:
Here are situations in which this method works perfectly.
When you are Shooting on Streets/ Locations with Sundries
This also depends on how streets are built in your particular area, but I would venture to say that generally, there are many items on streets that are convenient light stands.
Walls, street lamps, fences, poles, you name it.
In Hong Kong, which is where I am based in, I also found plotted plants and sand bags around streets as I shoot, which worked perfectly in holding the reflector at where I wanted it to be.
In other locations, you might find items, such as chairs, tables, jars, which are sturdy enough to hold your reflector in position, without external help.
Here is an example of how I slipped my reflector into the gaps of a fence on a street shoot:
When you are Shooting on a Less Windy Day
Reflectors are thin sheets of materials, and therefore easily carried away by the most gentle breeze.
Since you are resting the reflector against the items you find, it is not secured and can easily be blown away.
Therefore, this method works best when shooting on a calm day with minimal wind.
Pros of Using Objects Found in the Surroundings
Here are a few advantages of using this method:
No extra costs incurred, as opposed to getting light stands and clamps, hiring assistants etc
Minimal spatial requirements to ensure flexibility in location choice - setting up light stands imposes way more restrictions on where you can shoot
It frees up your other hand, so that you can operate your camera with both hands
Depending on what is in the scene, the reflector can be placed at a wide variety of angles
Cons of Using Objects Found in the Surroundings
And with any perks come some corresponding downsides:
Unpredictability in relation to what is in an outdoor scene - your environment limits what you can do
Doesn’t quite work on windy days
More sharing coming soon!
SUBSCRIBE via the box on the left for more PRO tips, and follow me on Instagram (@_bjiao__) and let me know what you think in the comments!
Share this article on Pinterest too!
Keep shooting, keep creating!
The mission of this blog is to provide the best insider information in the photography industry, as openly as possible. You have direct access to my
first-person experience as an aspiring photographer who talks, but also works.
Honest opinion are rarely available as public resources because this is a competitive industry. Huge sums are made when such information is delivered in the form of mentorship and workshops.
This blog is a great way in which I cover my daily expenses, but also provide real value.
If you have learnt something that would be worth at least $10, please consider donating to the page. This enables me to keep creating content and helping more people sustainably.
Your continued support for the blog is appreciated!

