With a Digital Single Lens Reflex Camera (DSLR), you have an array of tools at your disposal to take great portraits.
There are many ways to enhance your portrait photography, such as improving composition, giving better directions, and capturing emotions etc.
But there are practical things you can do, specifically when using a DSLR, to take your portraiture to another level. In this article, I will cover FIVE incredibly effective ways of getting the best portraits out of your DSLR.
It is strongly recommended that you shoot in RAW format. While you shoot, make use of a DSLR’s capabilities to manually expose for the highlights, focus and recompose, and create framing using the depth of field. After taking a few shots, review your photos and check for defects.
If you find this helpful, SUBSCRIBE to my channel via the box on the left to make the most out of my blog! Also, do share it with people who might be interested. Shoot me an email/ DM to share your thoughts too!
Also, Pin this article to your Portrait Photography Techniques boards in Pinterest if you find it helpful!

Shoot in RAW
What is a RAW file?
Raw files are a general category of files that are not pictures, but unprocessed data.
As you would know, pictures typically come in jpegs, which are actually compressed versions of the data captured by the camera.
Therefore, a raw file contains way more data than a jpeg file.
Every camera manufacturer has its own file extensions for raw files. For example, that of Canon is Cr.2, and that of Nikon is NEF.
You can easily select raw, or sometimes JPG+raw, in your DSLR’s menu.
Why shoot on RAW?
Simply put, RAW files allow more room for manipulation in editing because it contains more data to work with.

Original Portrait with Green Trees.

Photoshopped Portrait with Red Trees.
This is a case of extreme manipulation using raw files, as Greens are directly opposite to Reds on the colour wheel.
Doing the same thing on JPEG files will generate colour patches, blown out areas, noise that just makes the image unusable.
In portraits, you will always need to retouch the skin tone. And you definitely can’t afford creating patches on your subject’s skin.
Shooting raw should be an option on most DSLRs - this enhanced image quality and data retention is what sets DSLRs apart from smartphones or compact system cameras.
Drawbacks of shooting raw & solutions
There is one and only one issue with shooting raw, and it is the large file size.
JPEGs files are ranges below 5MB, whereas that of a raw file can go up to 50MB.
But if you are in photography for the long haul, this is something you just need to cope with.
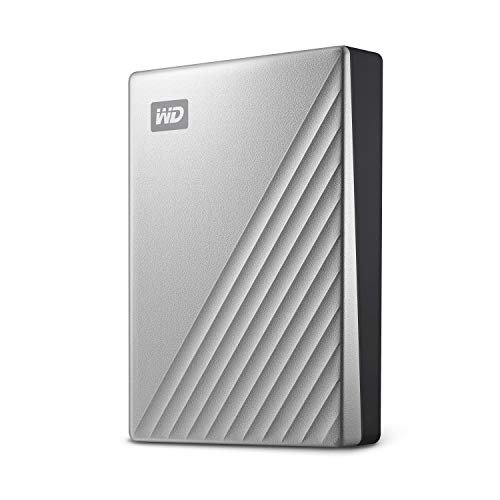
Most photographers store raw files using external hard discs. I personally use the WD Passport from Amazon.
With 4 TB, you will be able to fit 80K raw files, as a conservative estimation. You will probably reach that mark after being very serious about photography for around 2-3 years, so it should be a good option for anyone in it for the long run.
Manually Expose for Highlights
What is manual exposure?
One big improvement you get when upgrading to a DSLR is the ability to control where and how much exactly to expose your portraits.
As opposed to shooting on Auto-only cameras or a smartphone, you have controls over Aperture, Shutter Speed and ISO.
Why manually expose my portraits?
In portraiture, your subject’s skin should always be your TOP priority.
If the skin texture goes wrong, the portrait becomes useless.

Belinda Jiao Photography’s portrait of Jacqueline Wong in Central, Hong Kong, using Canon DSLR 5D Mark IV.
Usually when shooting portraits, there are areas of different brightness levels in your picture.
Sometimes the brightness levels are spread out evenly, sometimes more polarised.
In this example, I was shooting with harsh daylight directly hitting onto my subject, which created two main brightness levels - extreme highlights on my subject’s skin, and extreme shadows behind her.
If you shoot on auto, even on an DSLR, your camera might be confused as to what to take care of.
In this case, the camera would probably decide that the darker areas in her hair should be brighter, and that means the skin would have totally blown out into flat whites.
Therefore, fully utilise the control that a DSLR offers, to ensure the skin texture is always captured nicely when shooting portraits.
Framing using Depth of Field
What is the depth of field?
There exists one plane on which your DSLR’s focus is the sharpest.
From that point onwards, the focus gradually decreases in sharpness, until it gets to a point where the image becomes manifestly out of focus.
Meanwhile, this is pretty much all you need to know. But if you want to dig deeper, this is a good read on the subject by Photographylife.
Why use depth of field in portraits?
When shooting portraits, you should, by all means, direct your reader’s attention onto your subject.
At the same time, you also want to provide some context to your portraits to tell a story.
Therefore, you need to include parts of the environment into your portraits, in a way that it enhances, not minimises, the attention on your subject.
The depth of field is perfect for this purpose, as objects outside of the depth of field appears blurred, while the viewer can still tell what it is.

Belinda Jiao Photography’s portrait of Enya Gianni at Mong Kok, using Canon DSLR 5D Mark iv.
This was a portrait I did, featuring a dancer in an authentic Hong Kong wet market.
The point I wanted to make was to show the beauty of the lesser known parts of the city, as an amazing medium to create and perform art.
The logic here was that I wanted to show that this was a street setting, but not let objects on the street distract people’s focus on Enya.
Therefore, I dialled down my aperture to f/1.8, shooting wide open. Placing the blurred white van on the right created a framing effect.
How to create depth of field frames using a DSLR?
Even without deliberately taking care of the camera settings, it is safe to say that DSLRs almost always produce a stronger depth of field effect because they are equipped with a larger light sensor compared to smartphones and compact cameras.
To take this effect further, dial down the aperture stop (aka increasing the aperture) to get a shallower depth of field.
Another helpful way is to decrease the distance between your camera and your subject, relative to that between your subject and the background.
Focus and Recompose
What is focus and recompose?
It is a technique where you press the shutter halfway down on your DSLR to focus on your subject, and hold the shutter while moving your camera to position your subject in another part of the frame.
DSLRs are able to lock the focus on a plane at a certain distance from the lens.
As long as you move your camera along that same plane, theoretically your subject should still be in focus.
To leverage on this technique, go to the focusing settings panel on your DSLR and go for single focus or autofocus.
Why focus and recompose?
Usually, the focus is the best at the centre of the frame.
It follows that to get the sharpest results, the subject, or specifically, her eyes, needs to be at the centre of the frame.
But from a composition point of view, that is not always desirable in portraits.
Therefore, you should explore various options available on your DSLR, that gives you larger flexibility in portraiture composition.
Frequently Check Photos in Preview
What is preview?
After you take a shot, your DSLR screen displays the shot you have just taken.
Depending on your settings, it can last for a few seconds, or until you take another shot, or not at all.
Why frequently preview portraits?
Distinct from other genres of photography, certain elements in a portrait must be nailed on the spot.
As we mentioned, the skin texture must be done right because you can’t fabricate skin texture in post-production.
But if you take a bunch of shots and only sparingly preview them, it might be too late by the time you realise you made a mistake in your settings.
To make it easier for you to review your images, set up your DSLR to display the images after every click, for a period of time long enough for you to see clearly what you have done, and if necessary, press the zoom in key.
Ensuring a long enough display time can save you the hassle of having to manually click into preview mode, which significantly speeds up the feedback process.
Summary
In this article, we talked about taking great portraits using your DSLR by:
Shooting in raw format
Manually exposing for highlights
Framing portraits using depth of field
Focusing and recomposing, and
Previewing frequently.
More sharing coming soon!
SUBSCRIBE via the box on the left for more PRO tips, and follow me on Instagram (@_bjiao__) and let me know what you think in the comments.
Share this article on Pinterest too!
Keep shooting, keep creating!


The mission of this blog is to provide the best insider information in the photography industry, as openly as possible. You have direct access to my
first-person experience as an aspiring photographer who talks, but also works.
Honest opinion are rarely available as public resources because this is a competitive industry. Huge sums are made when such information is delivered in the form of mentorship and workshops.
This blog is a great way in which I cover my daily expenses, but also provide real value.
If you have learnt something that would be worth at least $10, please consider donating to the page. This enables me to keep creating content and helping more people sustainably.
Your continued support for the blog is appreciated!